
How to do your 3 month lookback analysis - Step by Step
Use the 3 month lookback analysis to review where your money has gone over the last 3 months and turn that into a realistic budget you can stick to going forward.
Before you start, watch this walkthrough video from Brennan so you understand how to use the template and what you will be doing during the exercise.
This setup will help you:
copy the 3 month lookback template
open Avery in Google Sheets
review your categories
categorize your transactions
use the finished analysis to create a budget for the future
Before you begin
If this is your first time using the template, watch the video first. It will make the setup much easier to follow.
Open the 3 month lookback template.
Click Use Template to create your own copy in Google Sheets.
Open the copied sheet in your Google account.
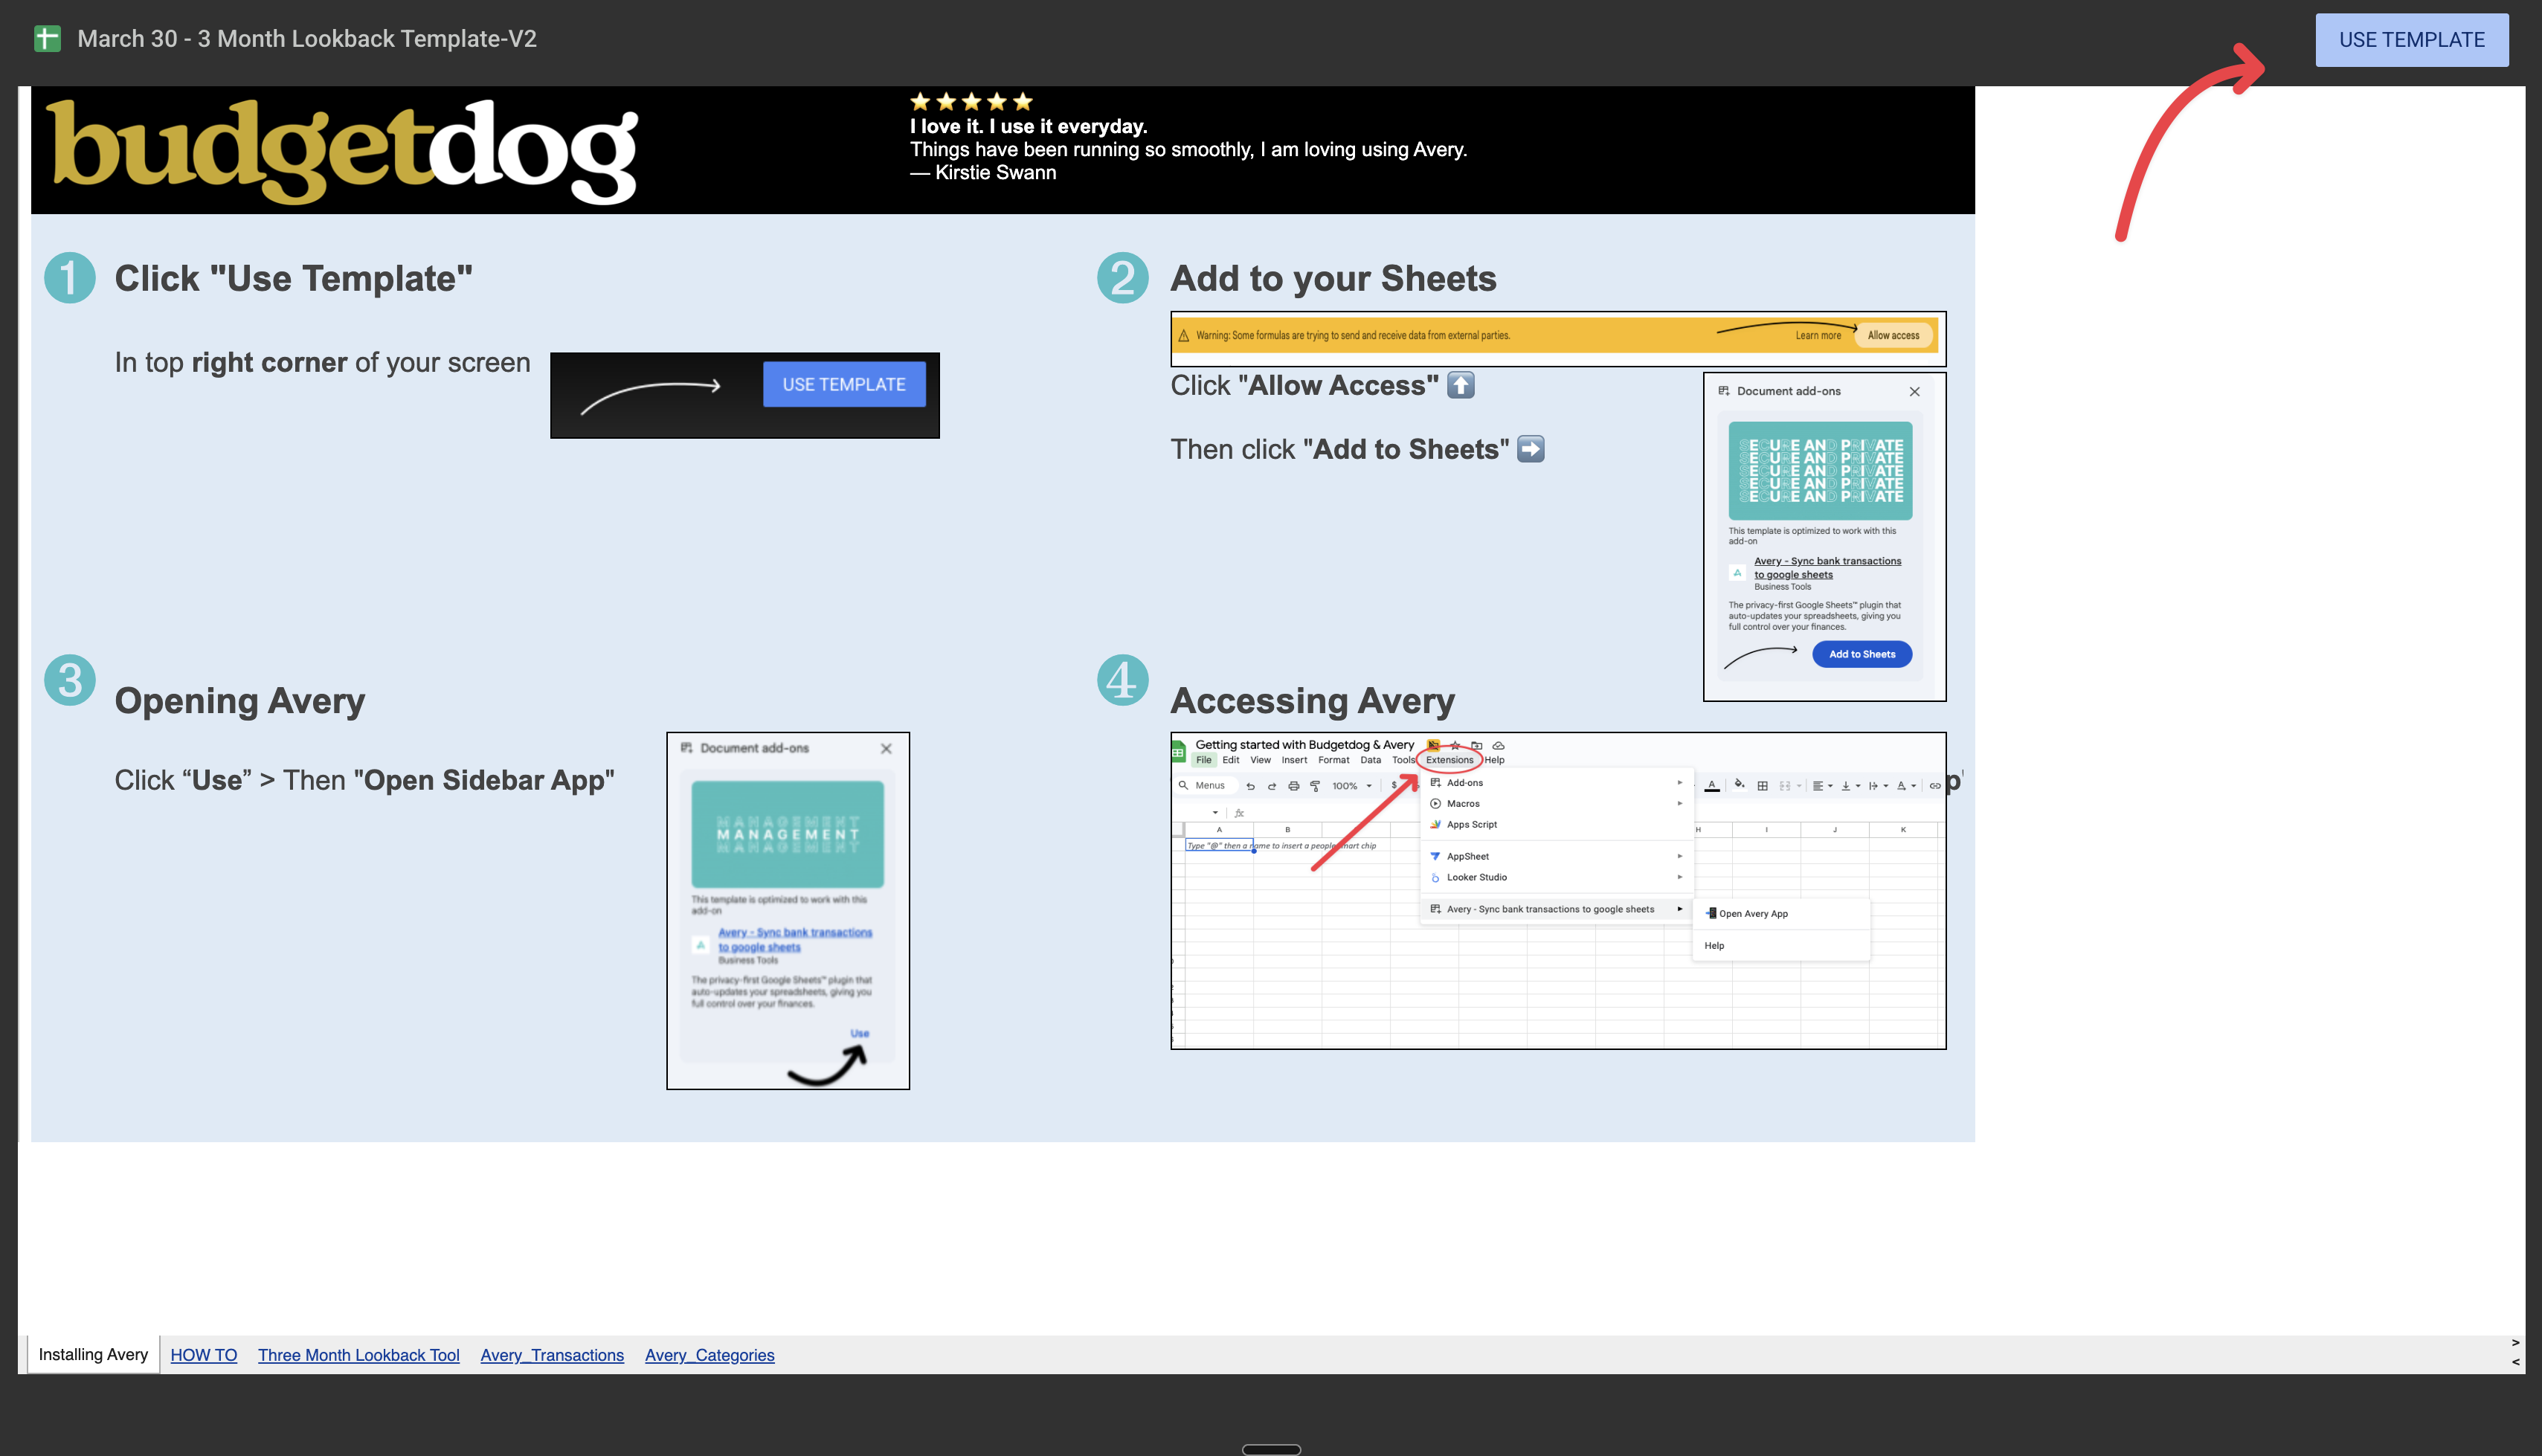
Step 1: Add Avery to your sheet
Follow the prompts shown in the template to install and open Avery.
If Google shows a warning about external data, click Allow access.
Click Add to Sheets.
Click Use.
If needed, open Avery from Extensions.
Once Avery opens in the sidebar, you are ready to start the guided setup.
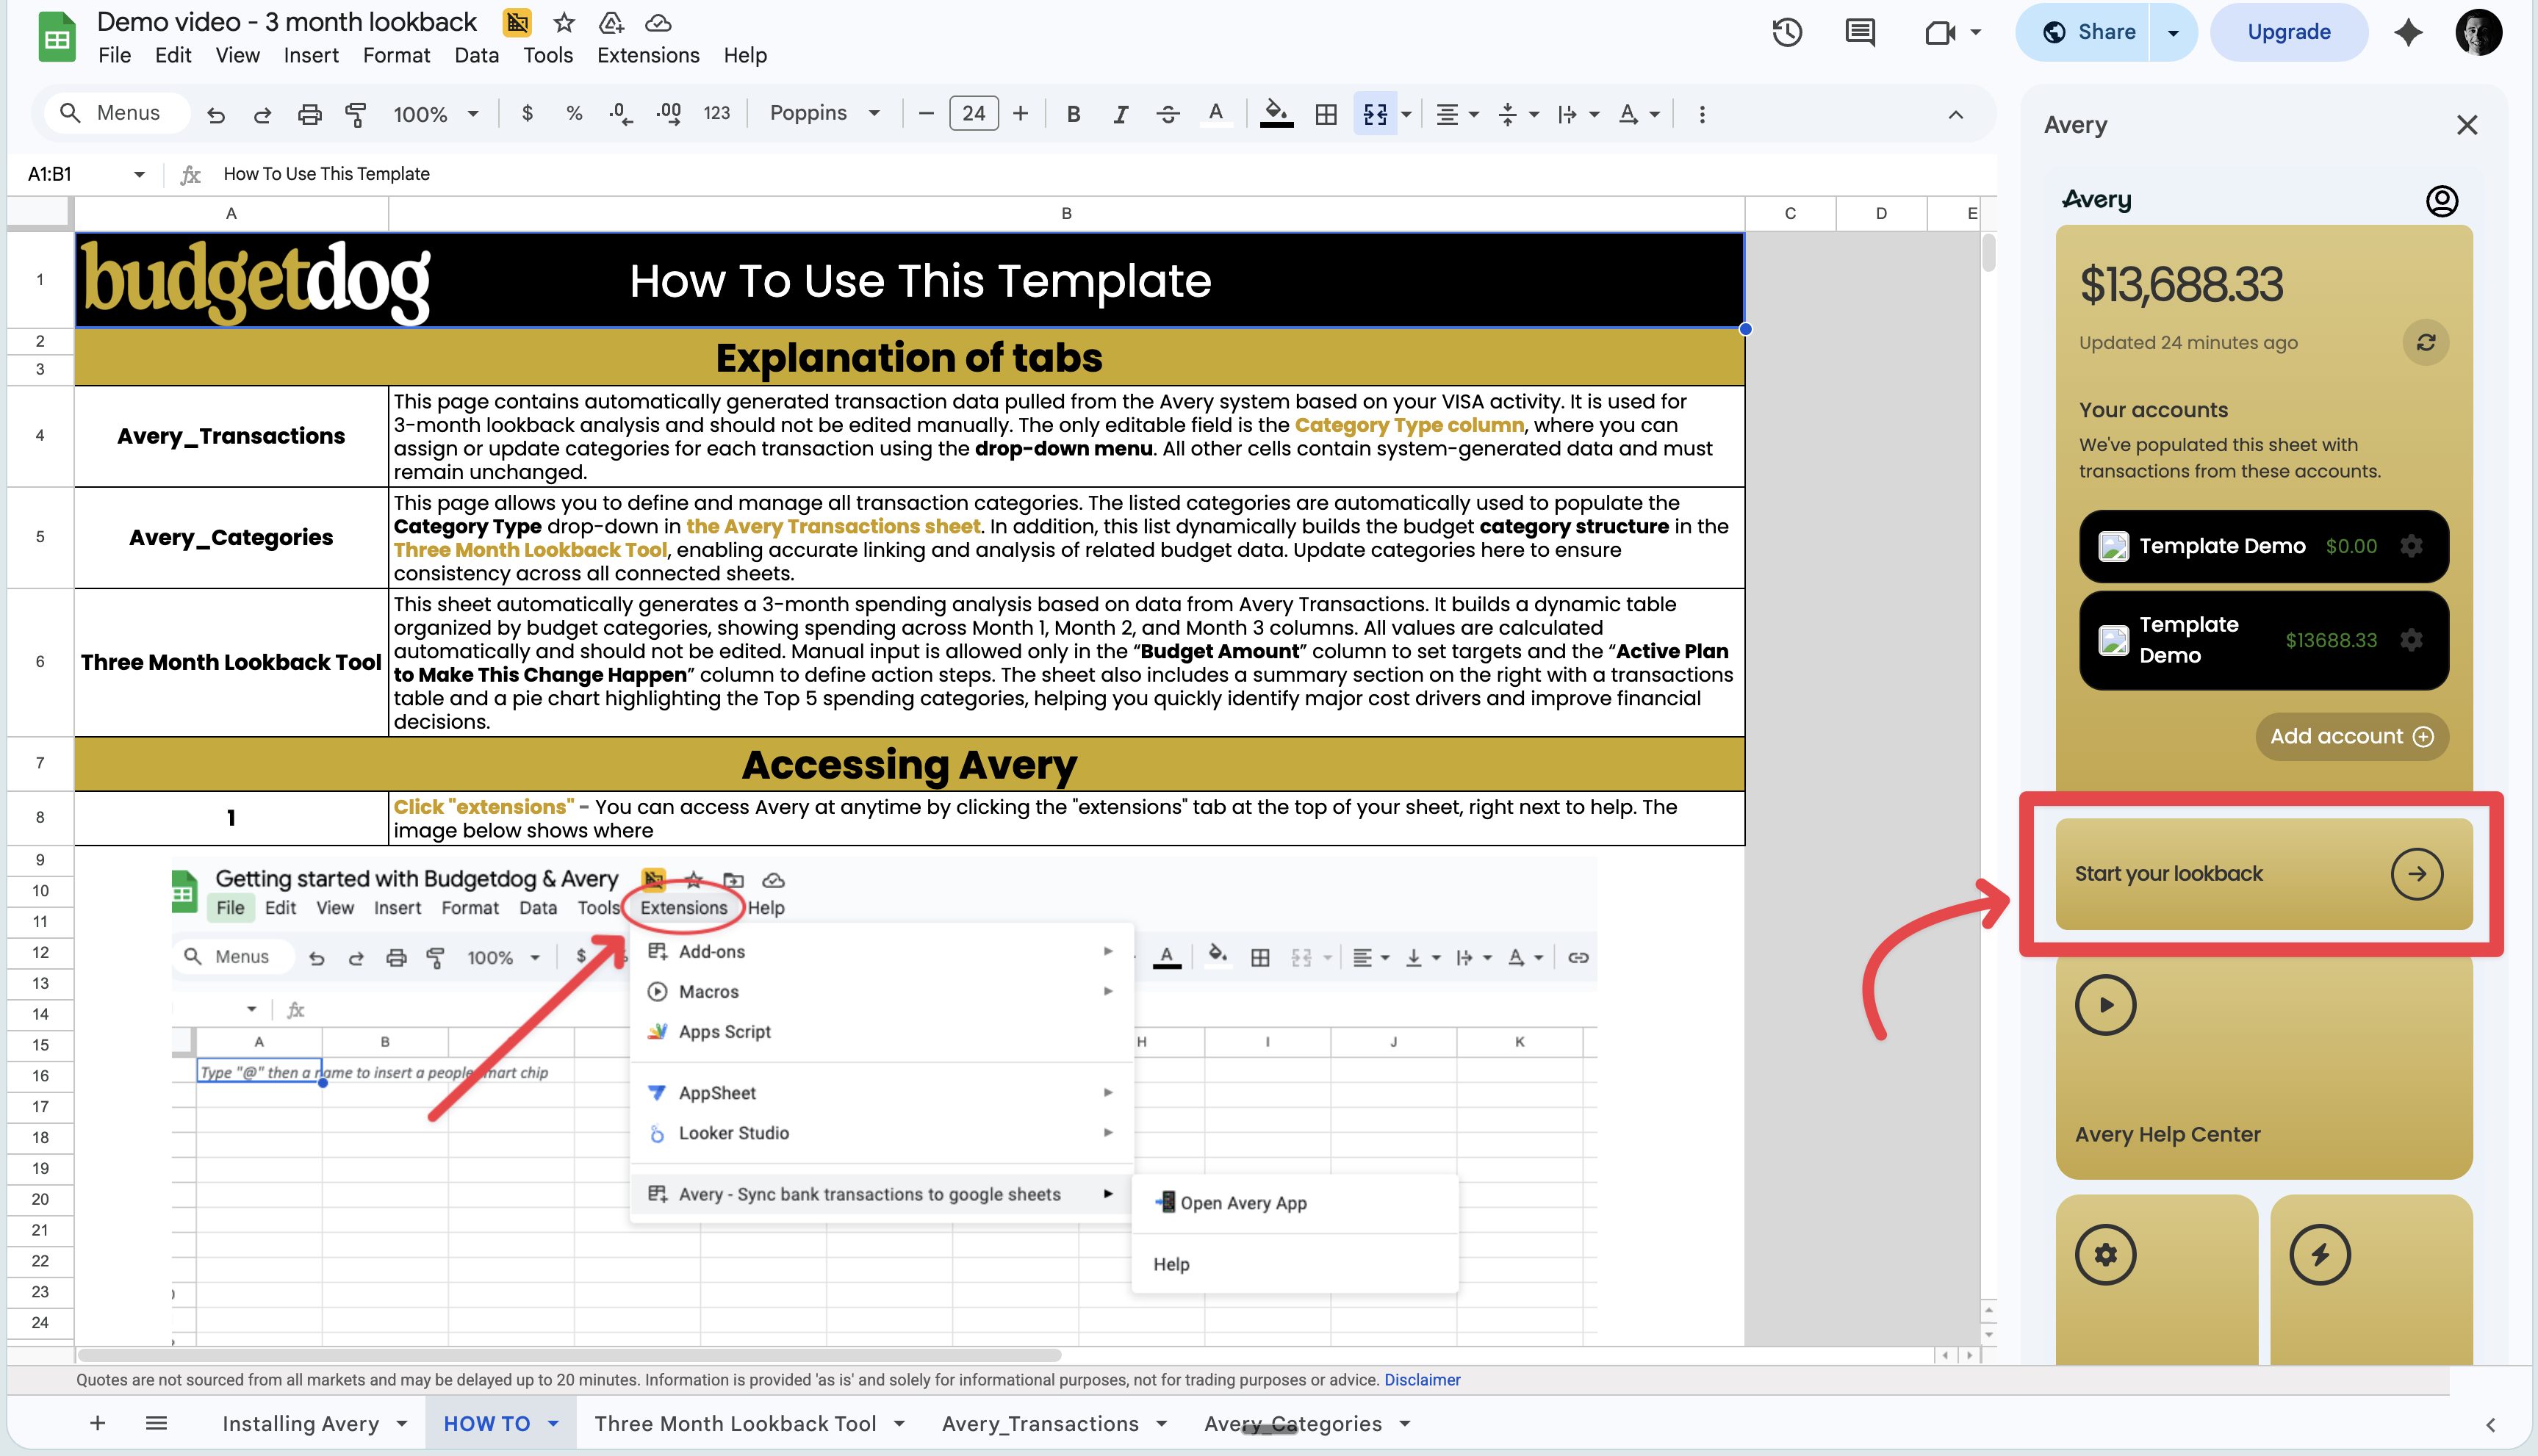
Step 2: Start the lookback setup
In the Avery sidebar, click Start your lookback.
This opens the onboarding flow that guides you through the rest of the setup.
Step 3: Review your categories
The onboarding flow will take you to the Avery Categories tab.
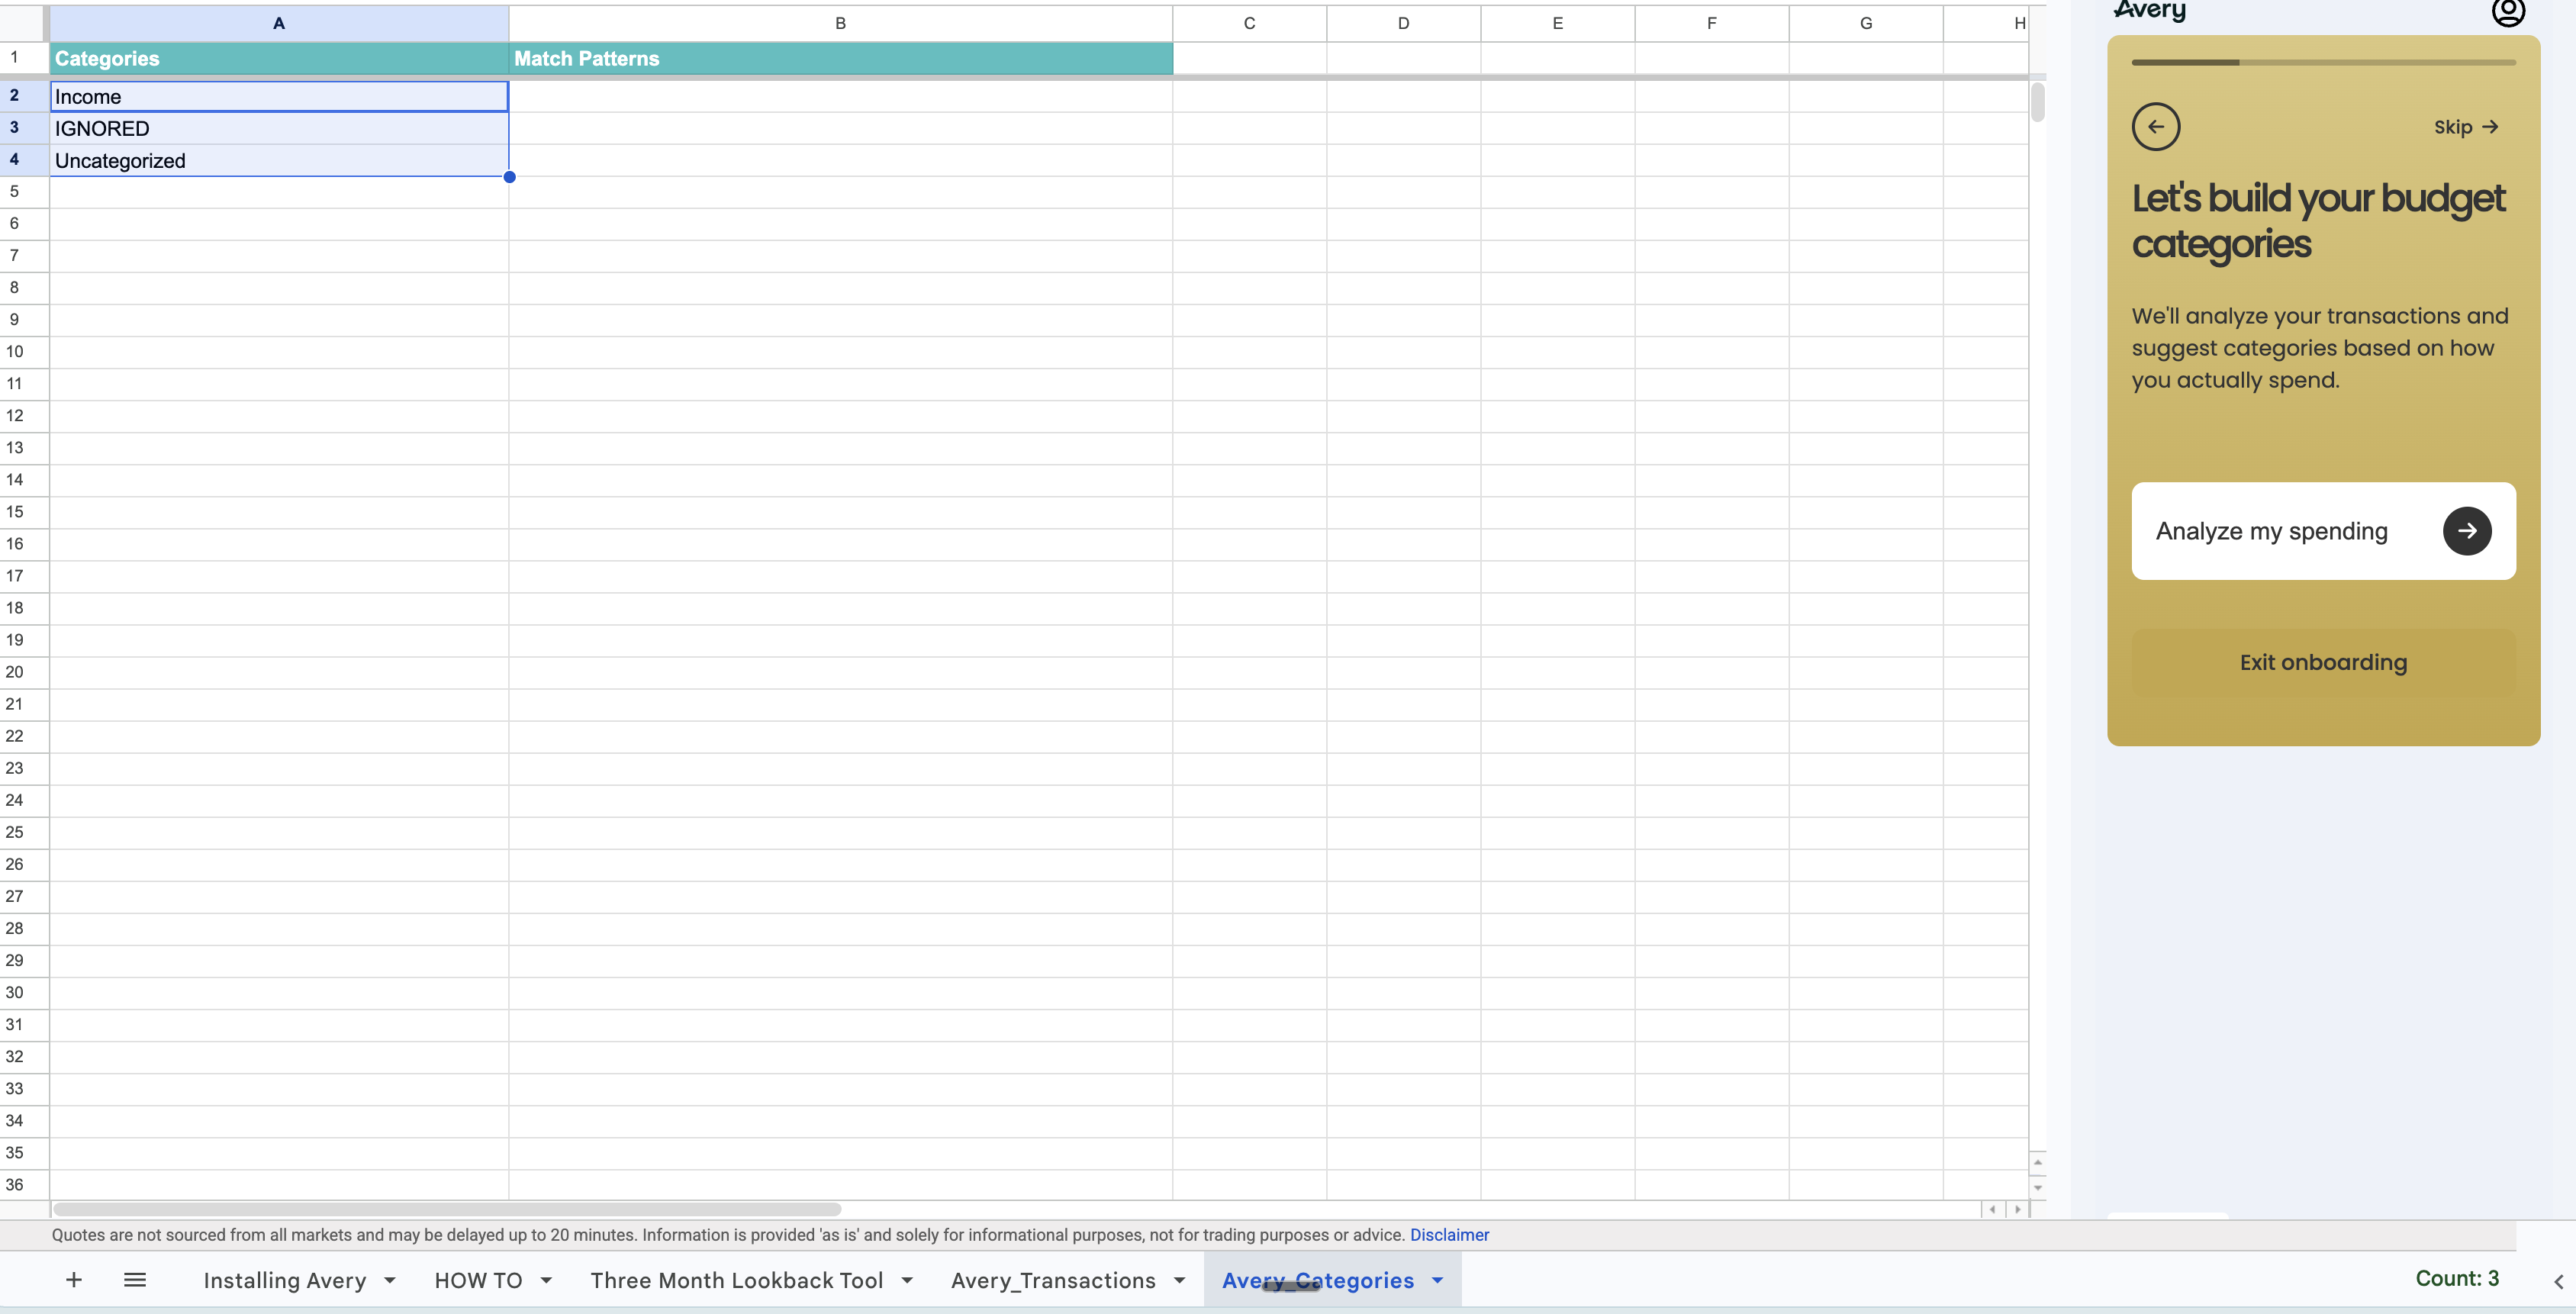
Do not delete the default categories already included in the sheet.
If you already use your own categories, paste them below the existing categories instead of replacing them.
When you are ready:
click Analyze my spending
let Avery suggest categories based on your spending history
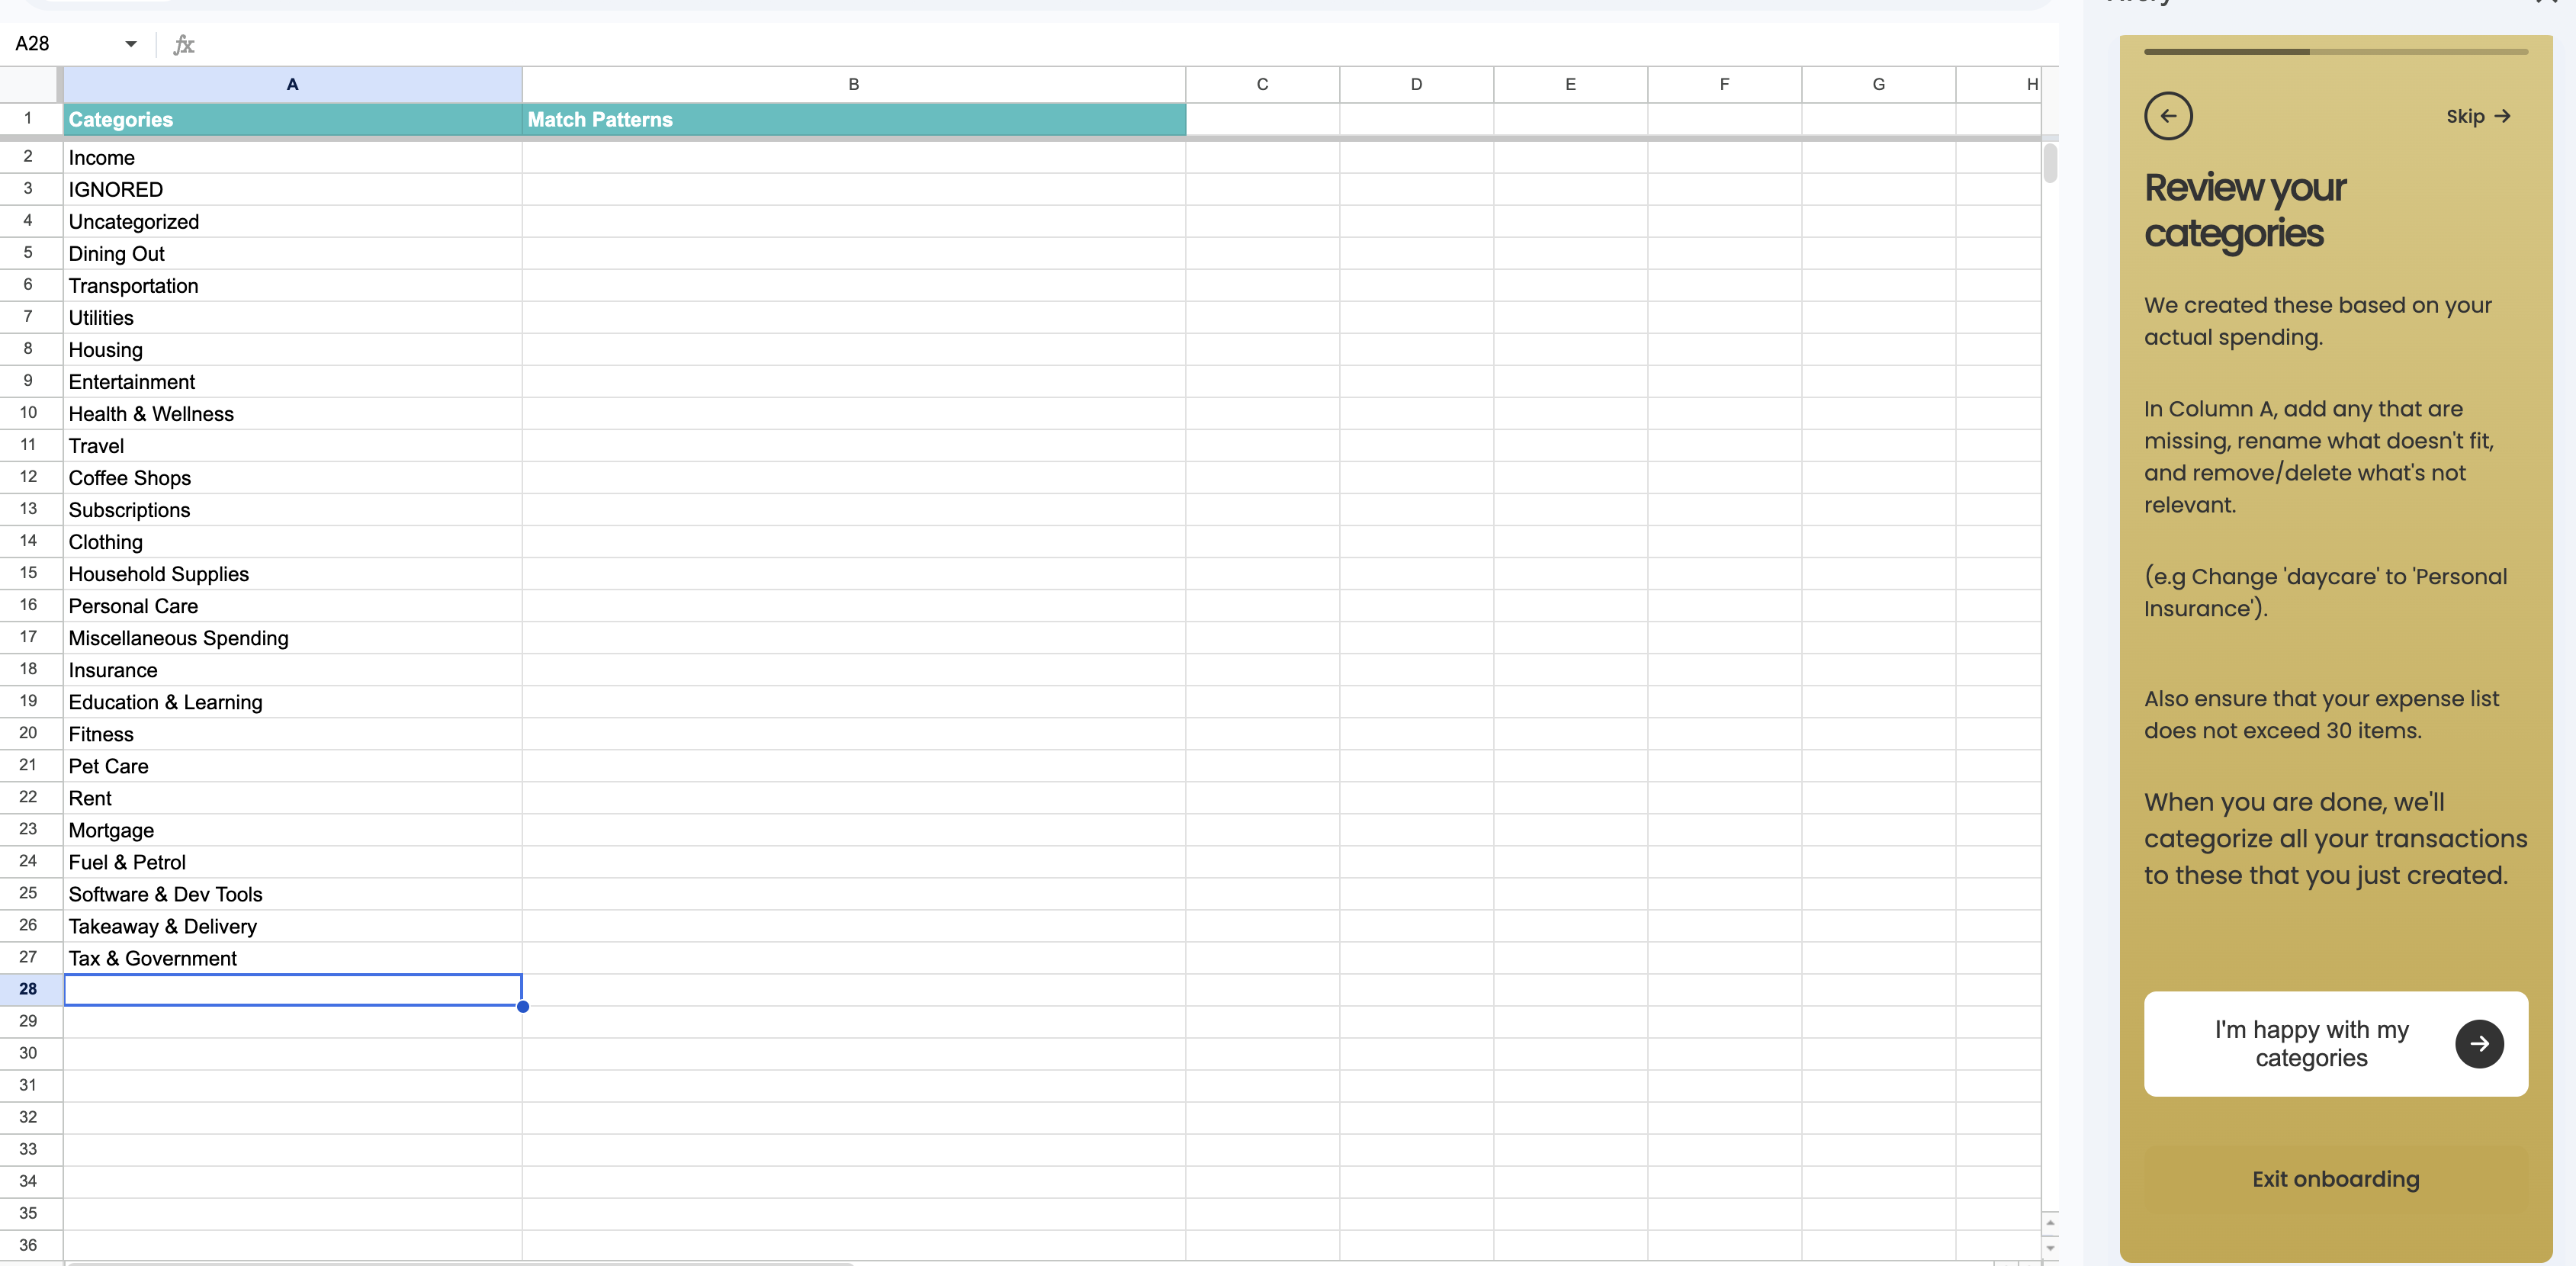
After Avery builds the list, review the categories in column A. You can:
add categories
rename categories
remove categories you do not want to use
When the list looks right, click I'm happy with my categories.
Step 4: Categorize your transactions
Go to the Avery_Transactions tab.
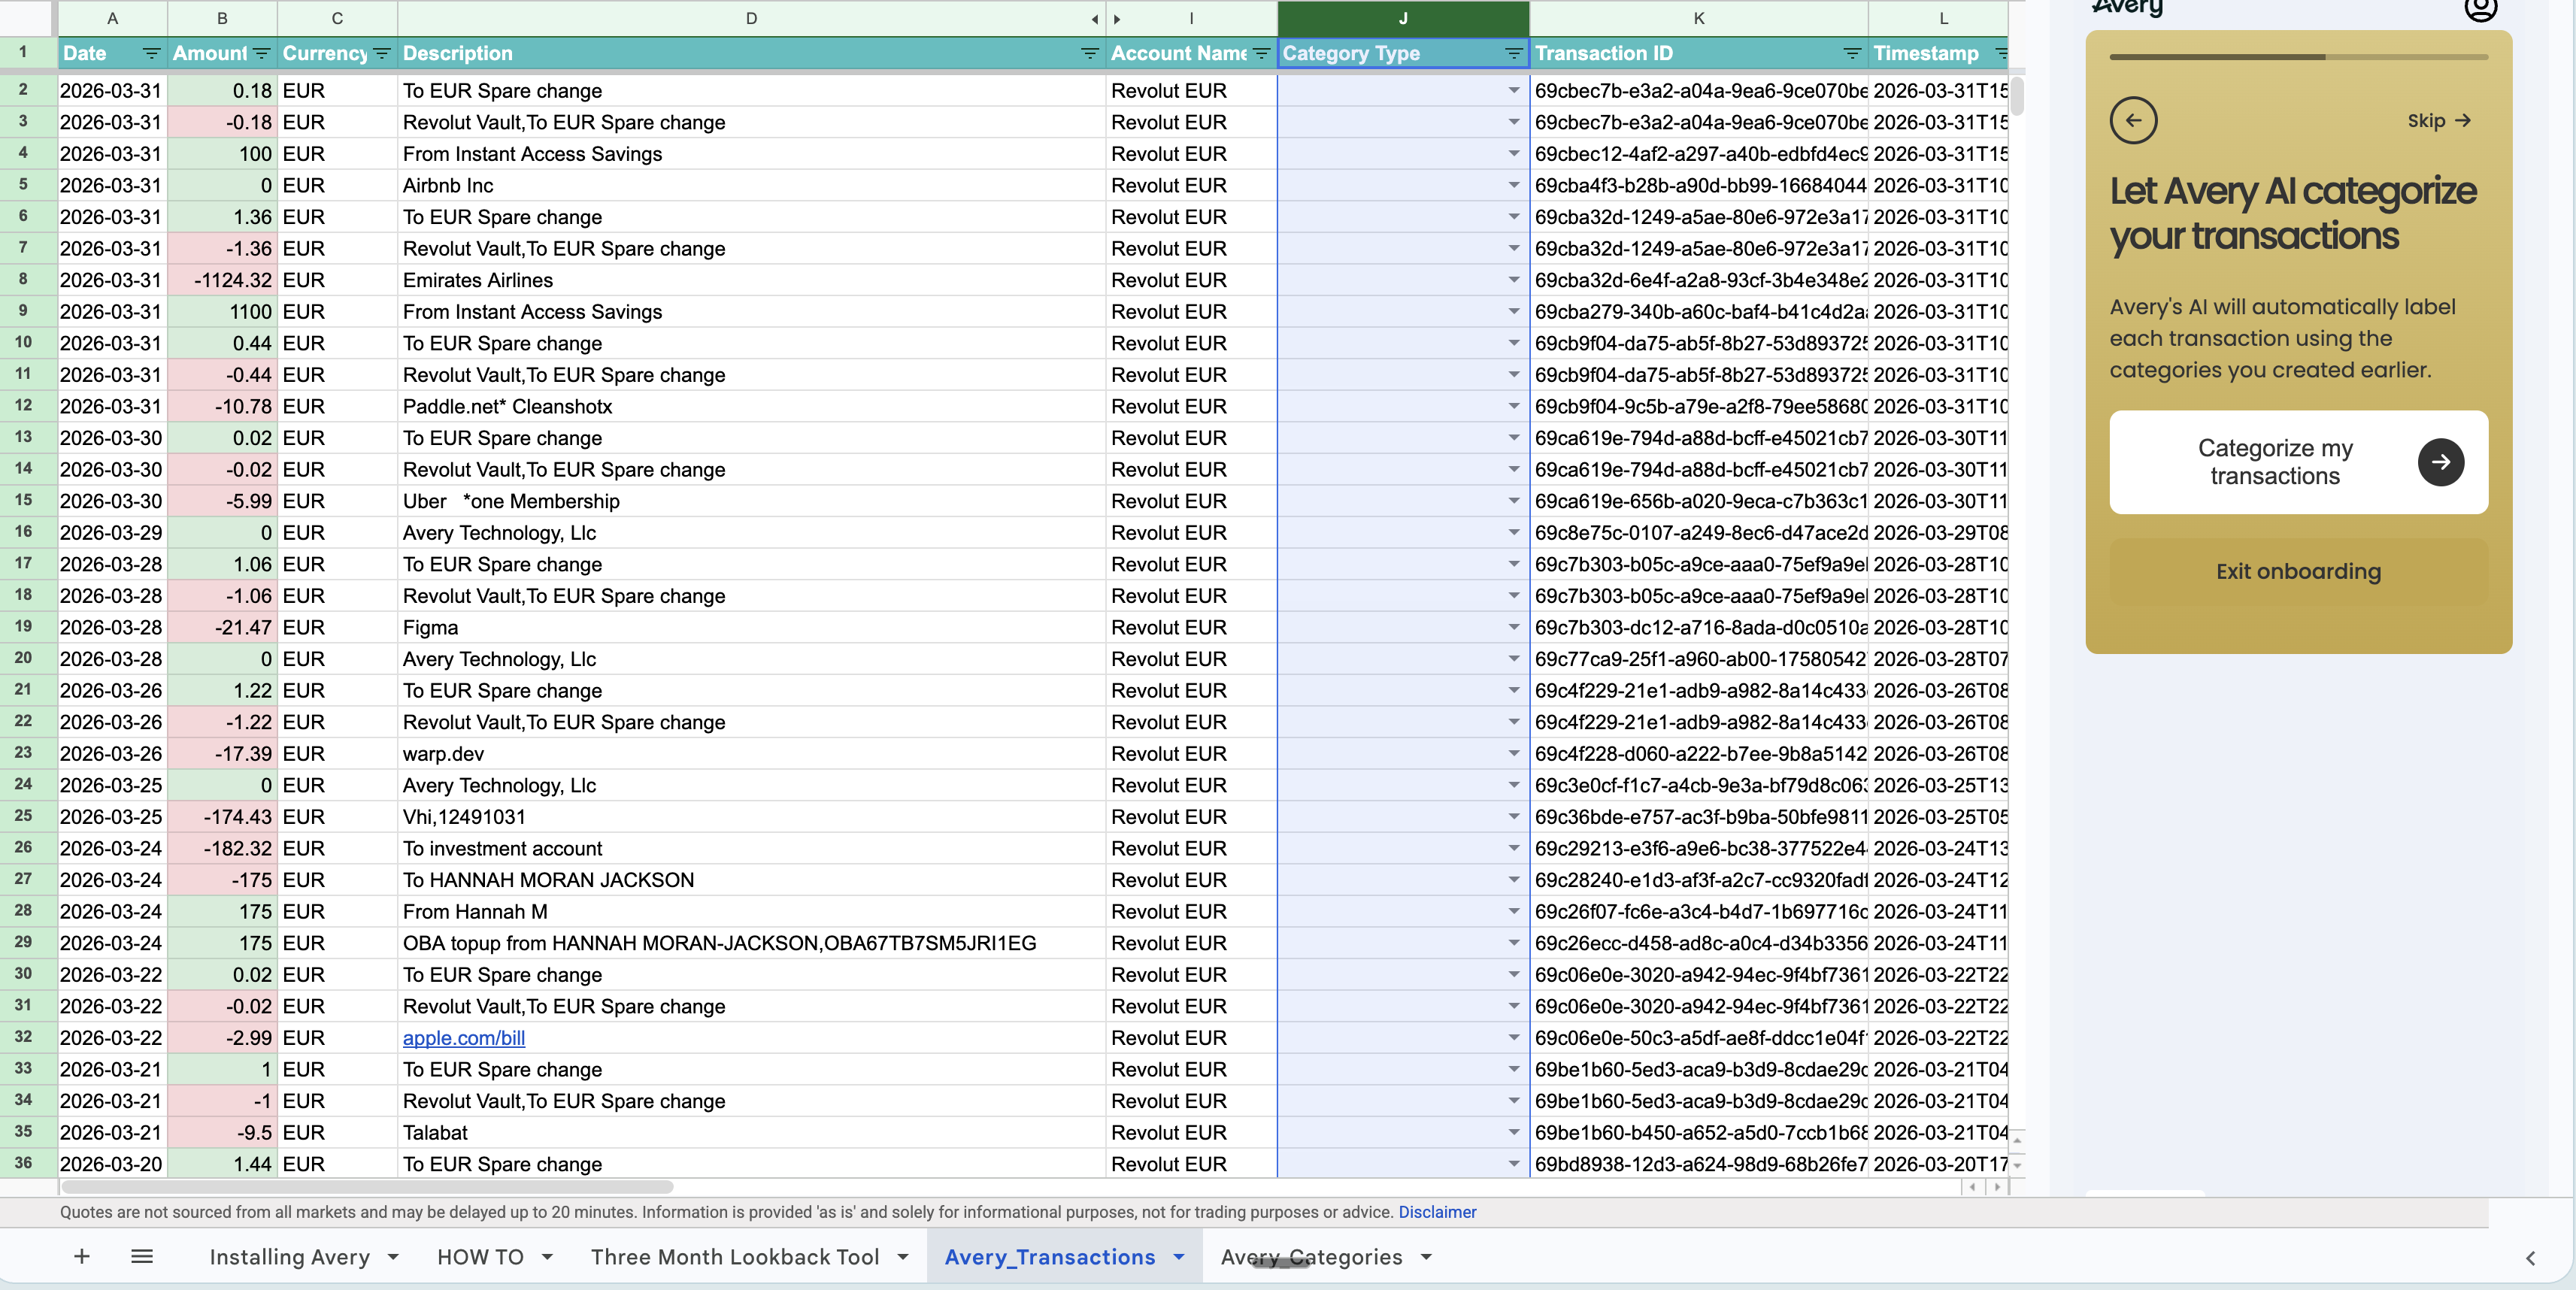
In the Avery sidebar, click Categorize my transactions.
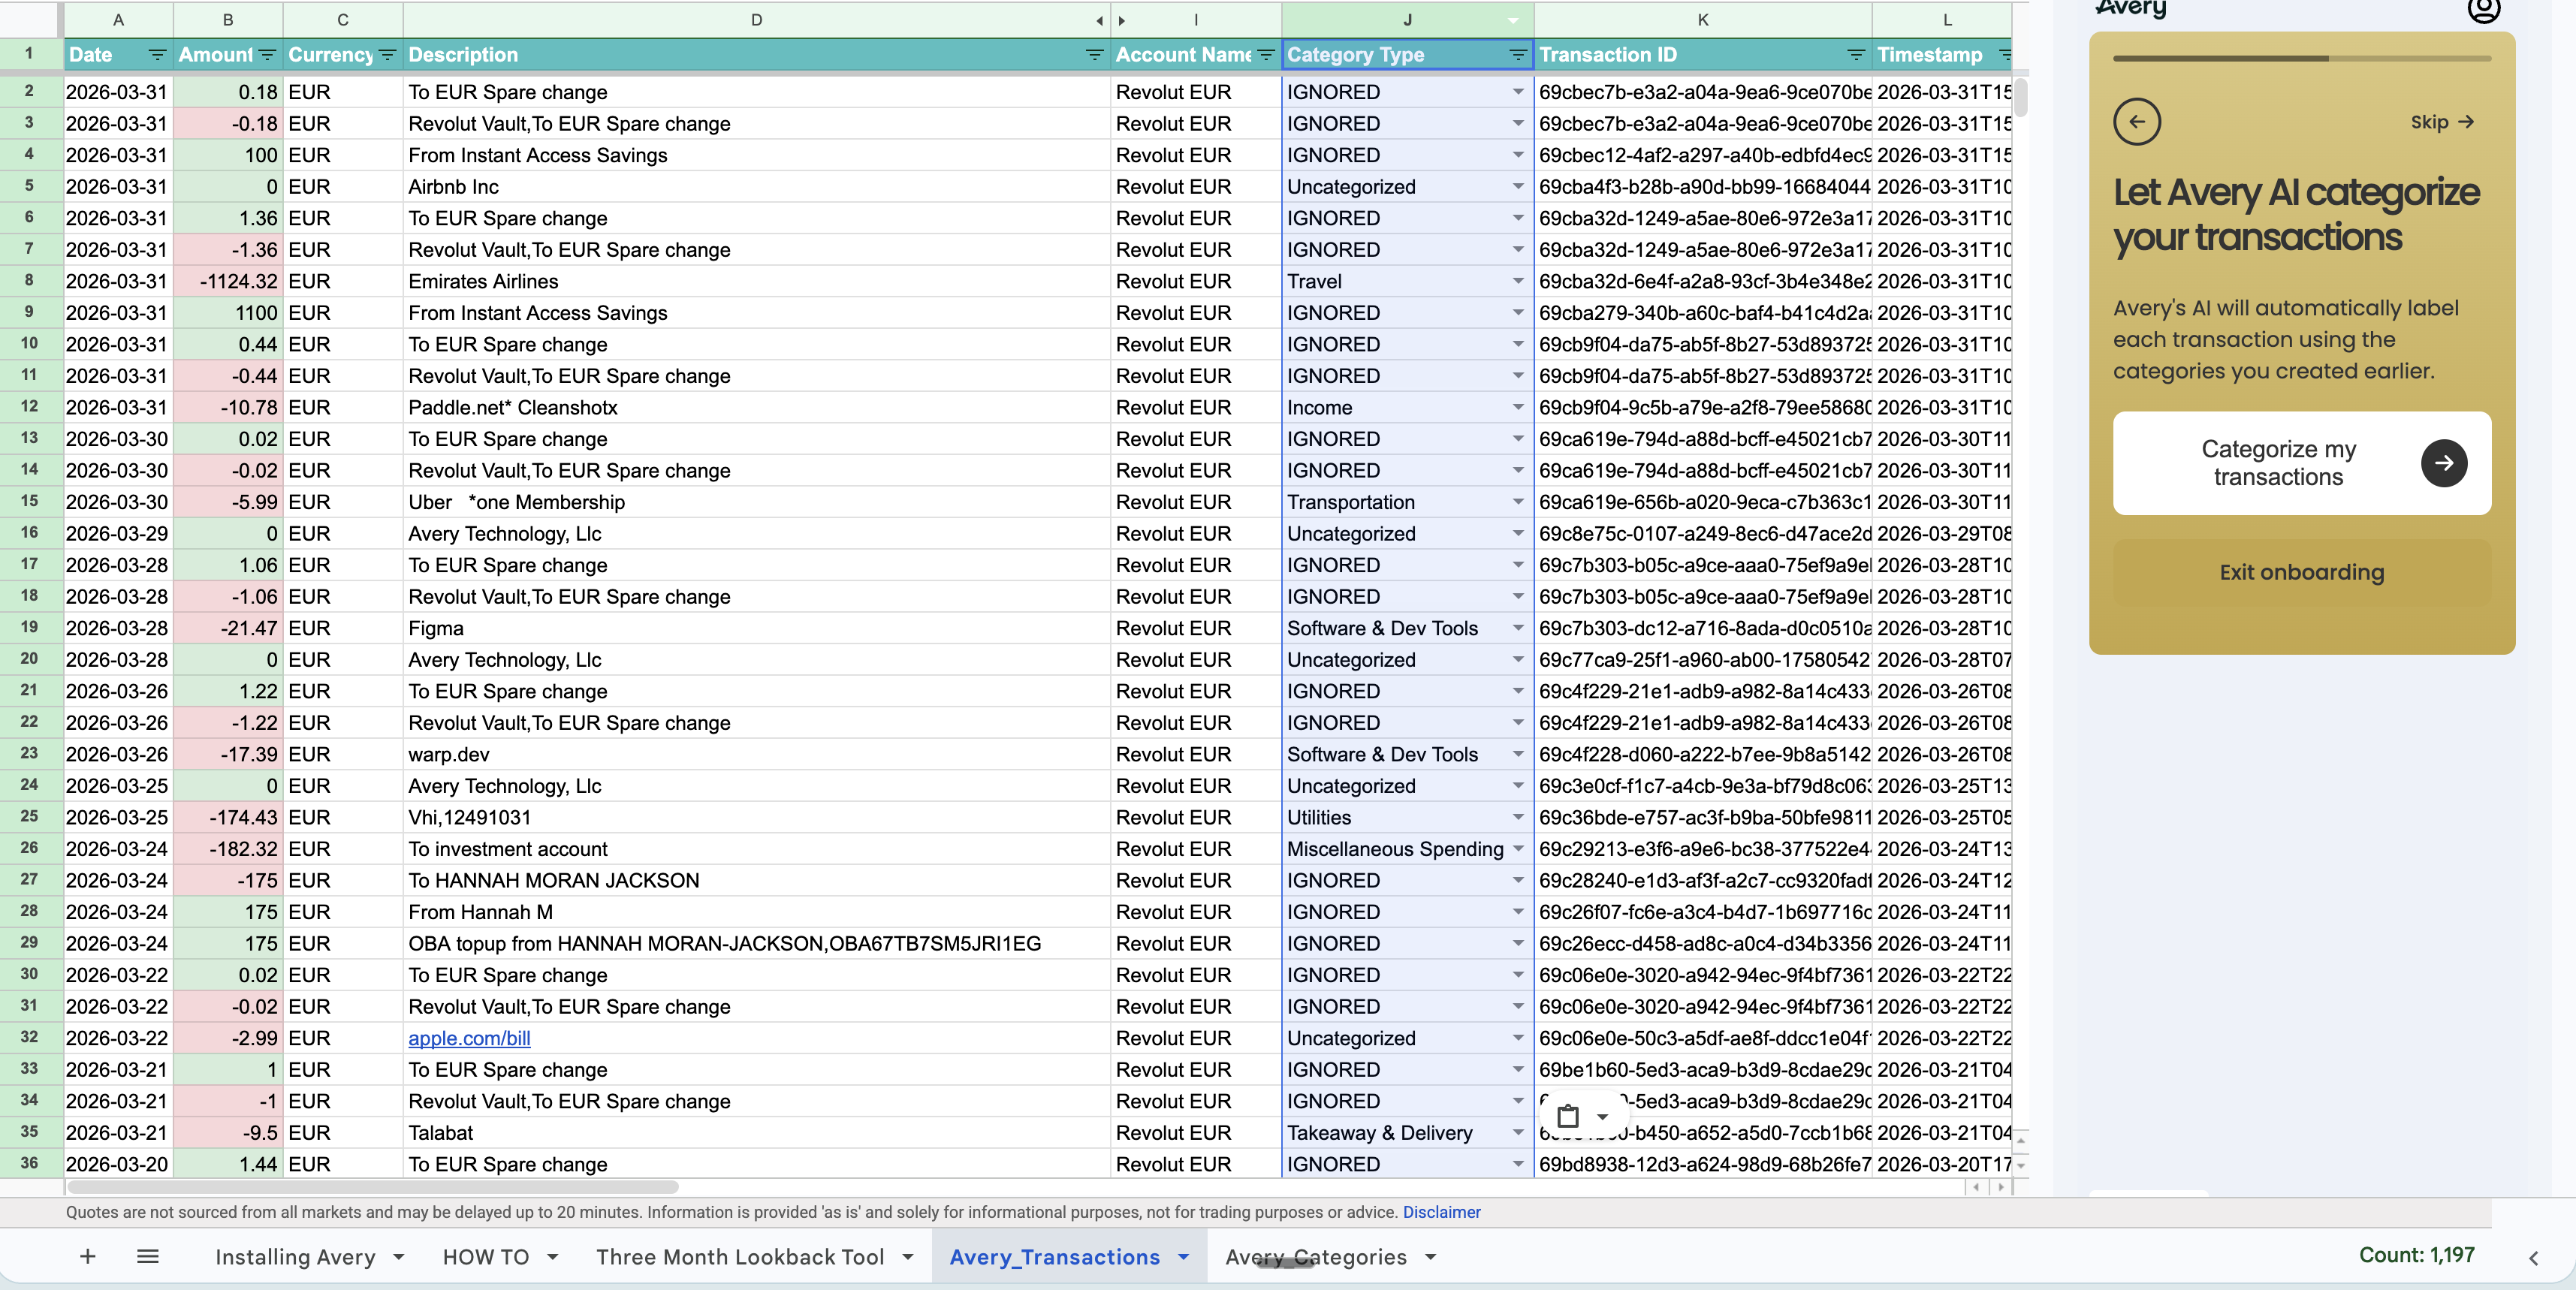
Avery will use the categories you approved to automatically assign categories to your imported transactions.
If you have a large number of transactions, categorization can take a little time to finish.
Step 5: Open the 3 month lookback analysis
Once categorization is complete, it will bring you to the Three Month Lookback Budget Analysis tab.
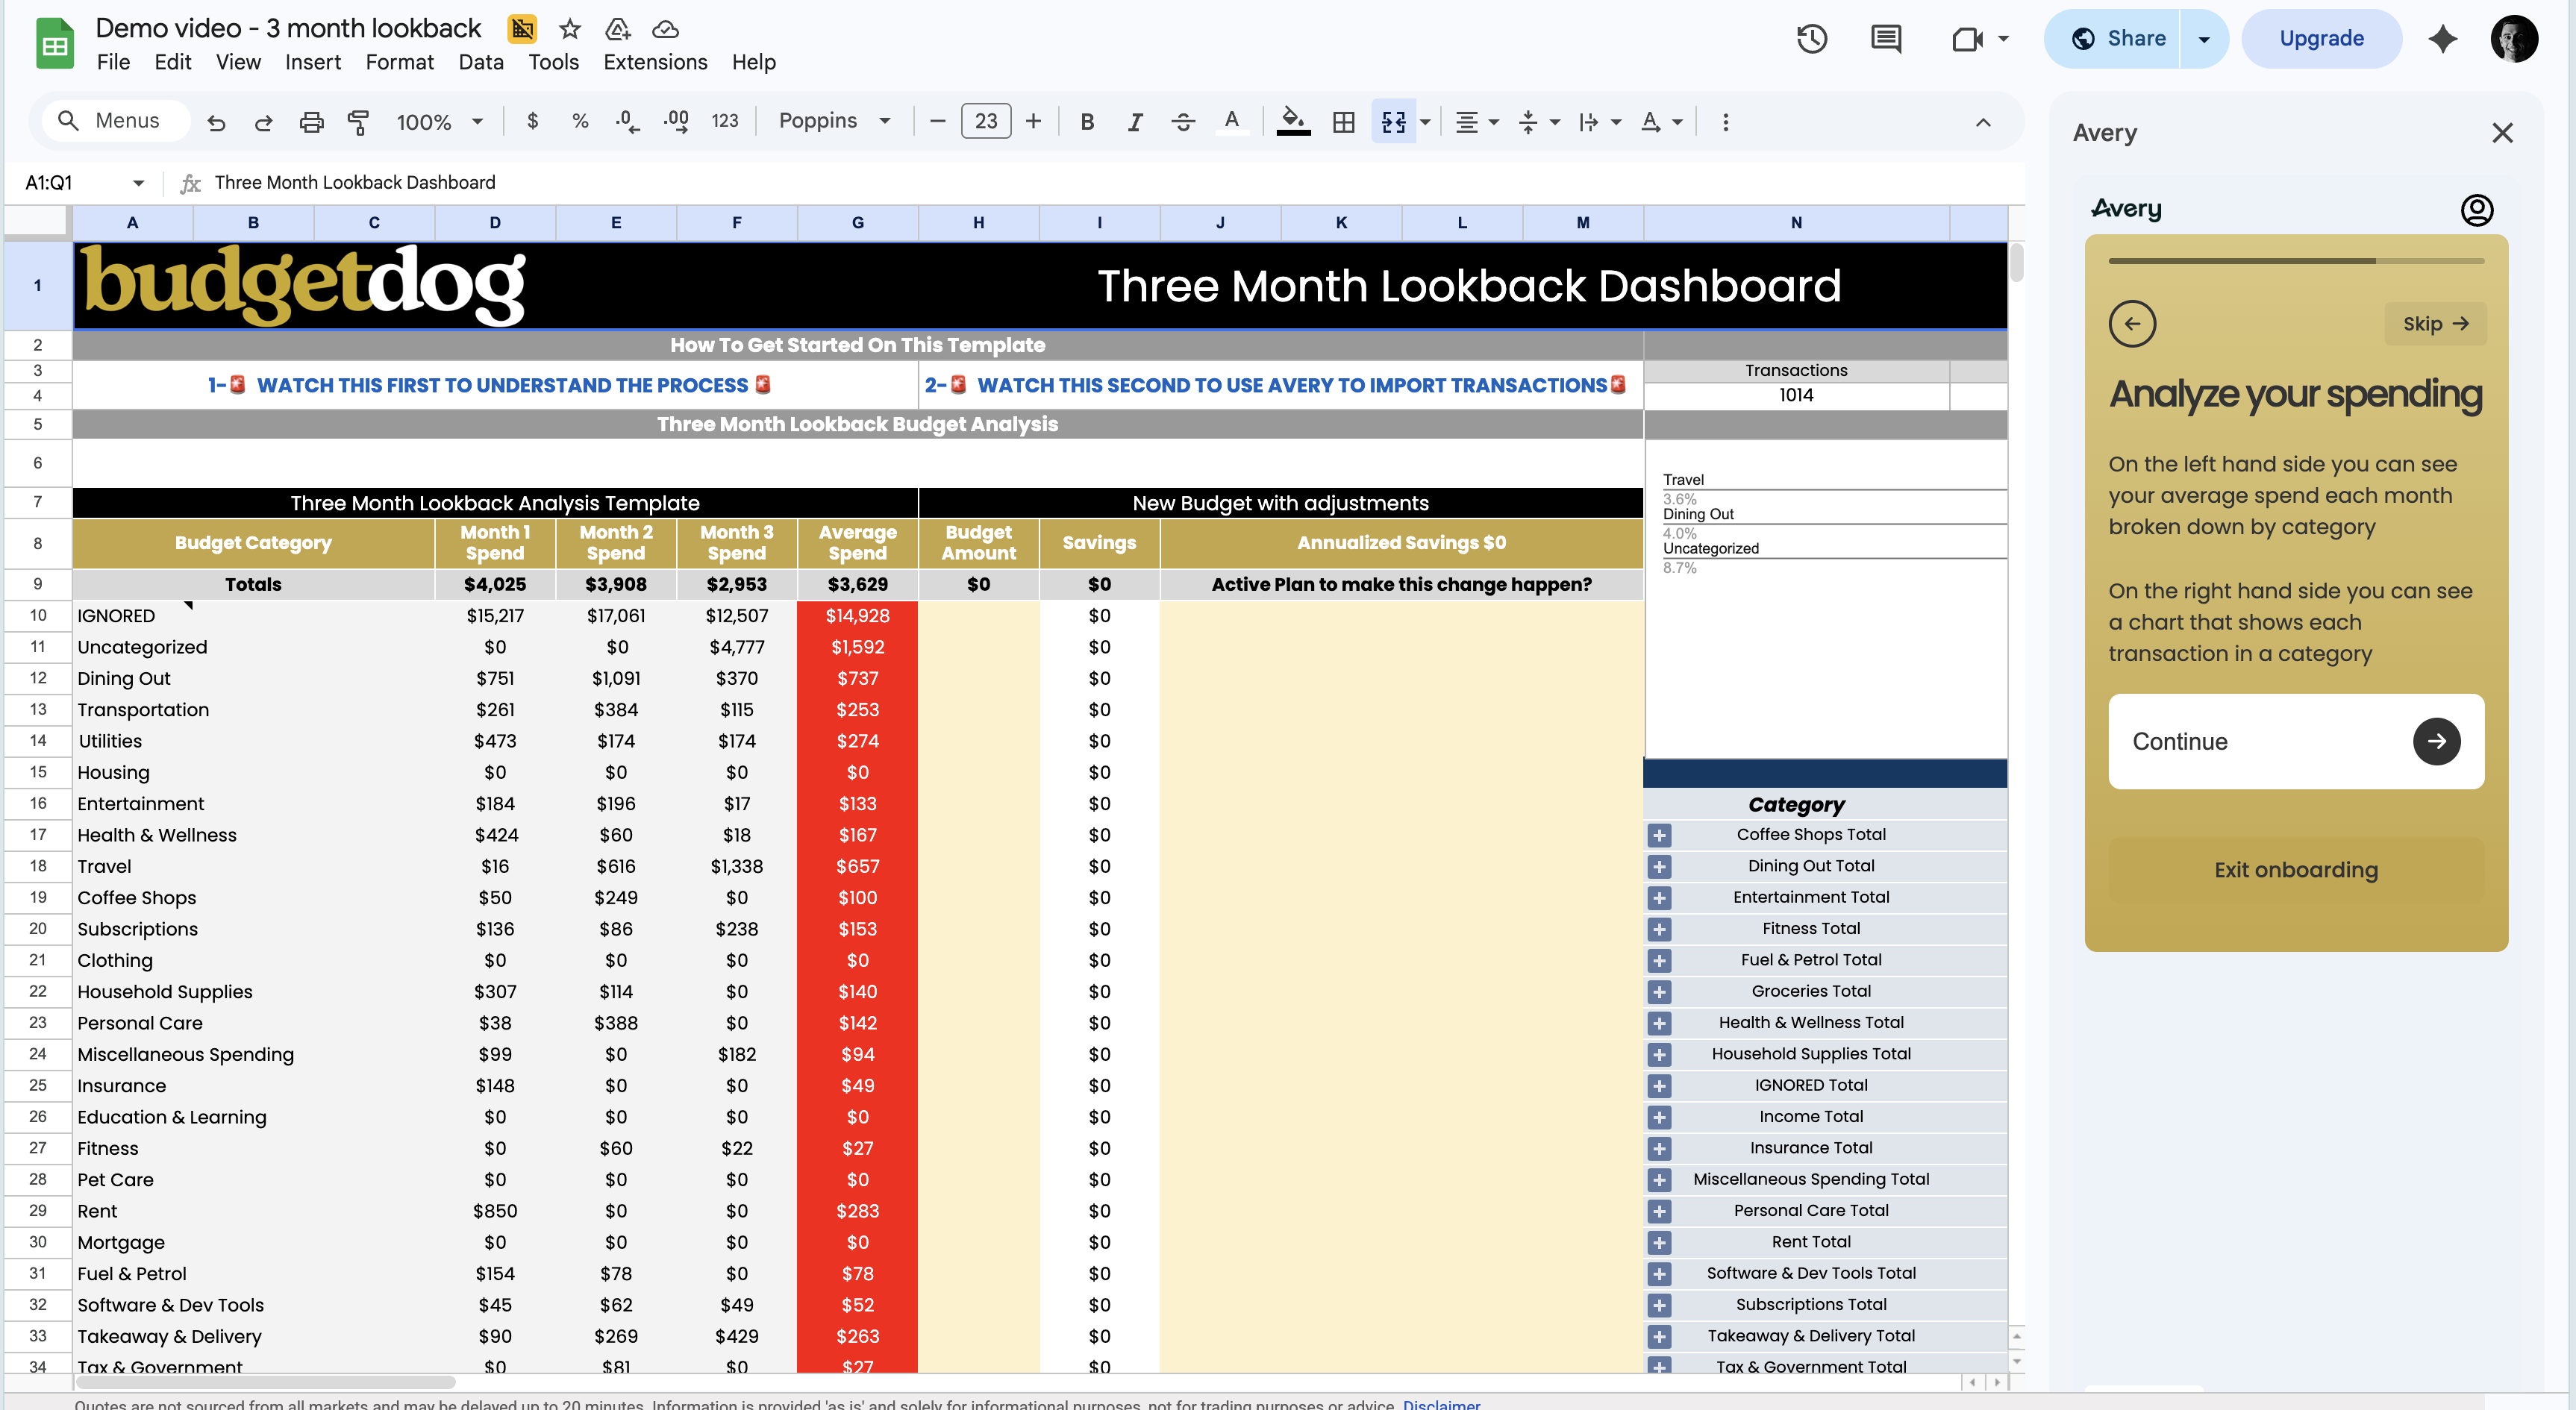
This is where you complete the actual exercise.
In this tab, you can:
review where your money has gone over the last 3 months
spot patterns in your spending
build a budget you want to follow going forward
Understand the spending summary
The main table on the left shows your spending by category across the last 3 months.
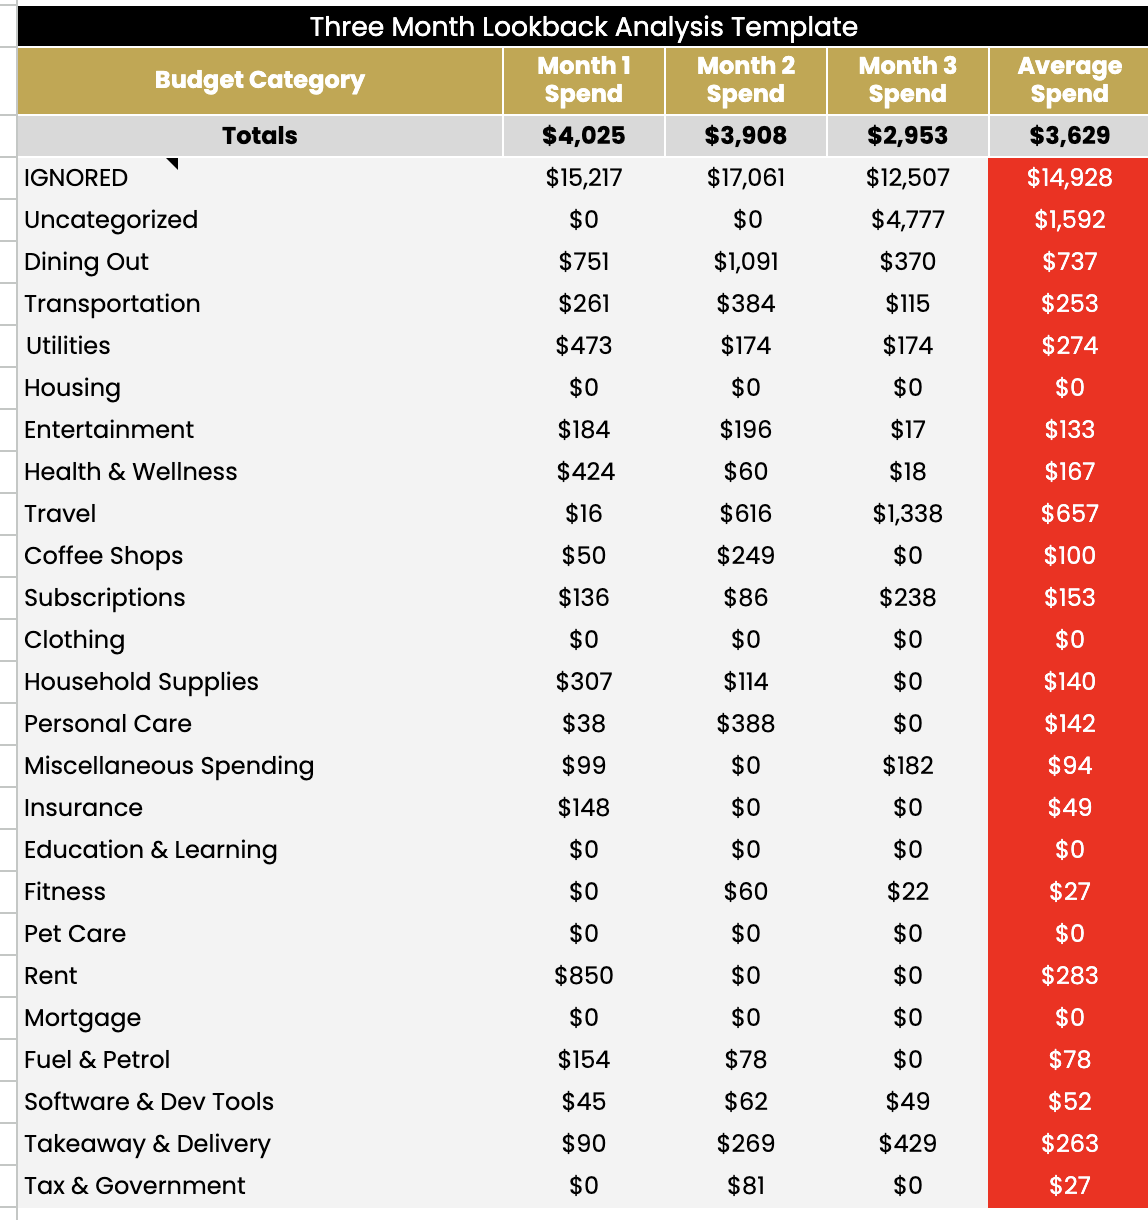
Each row is one of your budget categories
Each month column shows what you spent in that category.
The Average Spend column shows what you typically spend each month in that category
Use this section to look for:
categories where you spend a lot every month
categories with one-off spikes
categories where your average spend is higher than expected
If a transaction is categorized as IGNORED or Uncategorized. They will NOT be included in your totals
Expand a category to inspect transactions
The table on the right hand side gives you detailed view of every transaction in each category. Click the + button next to that category.
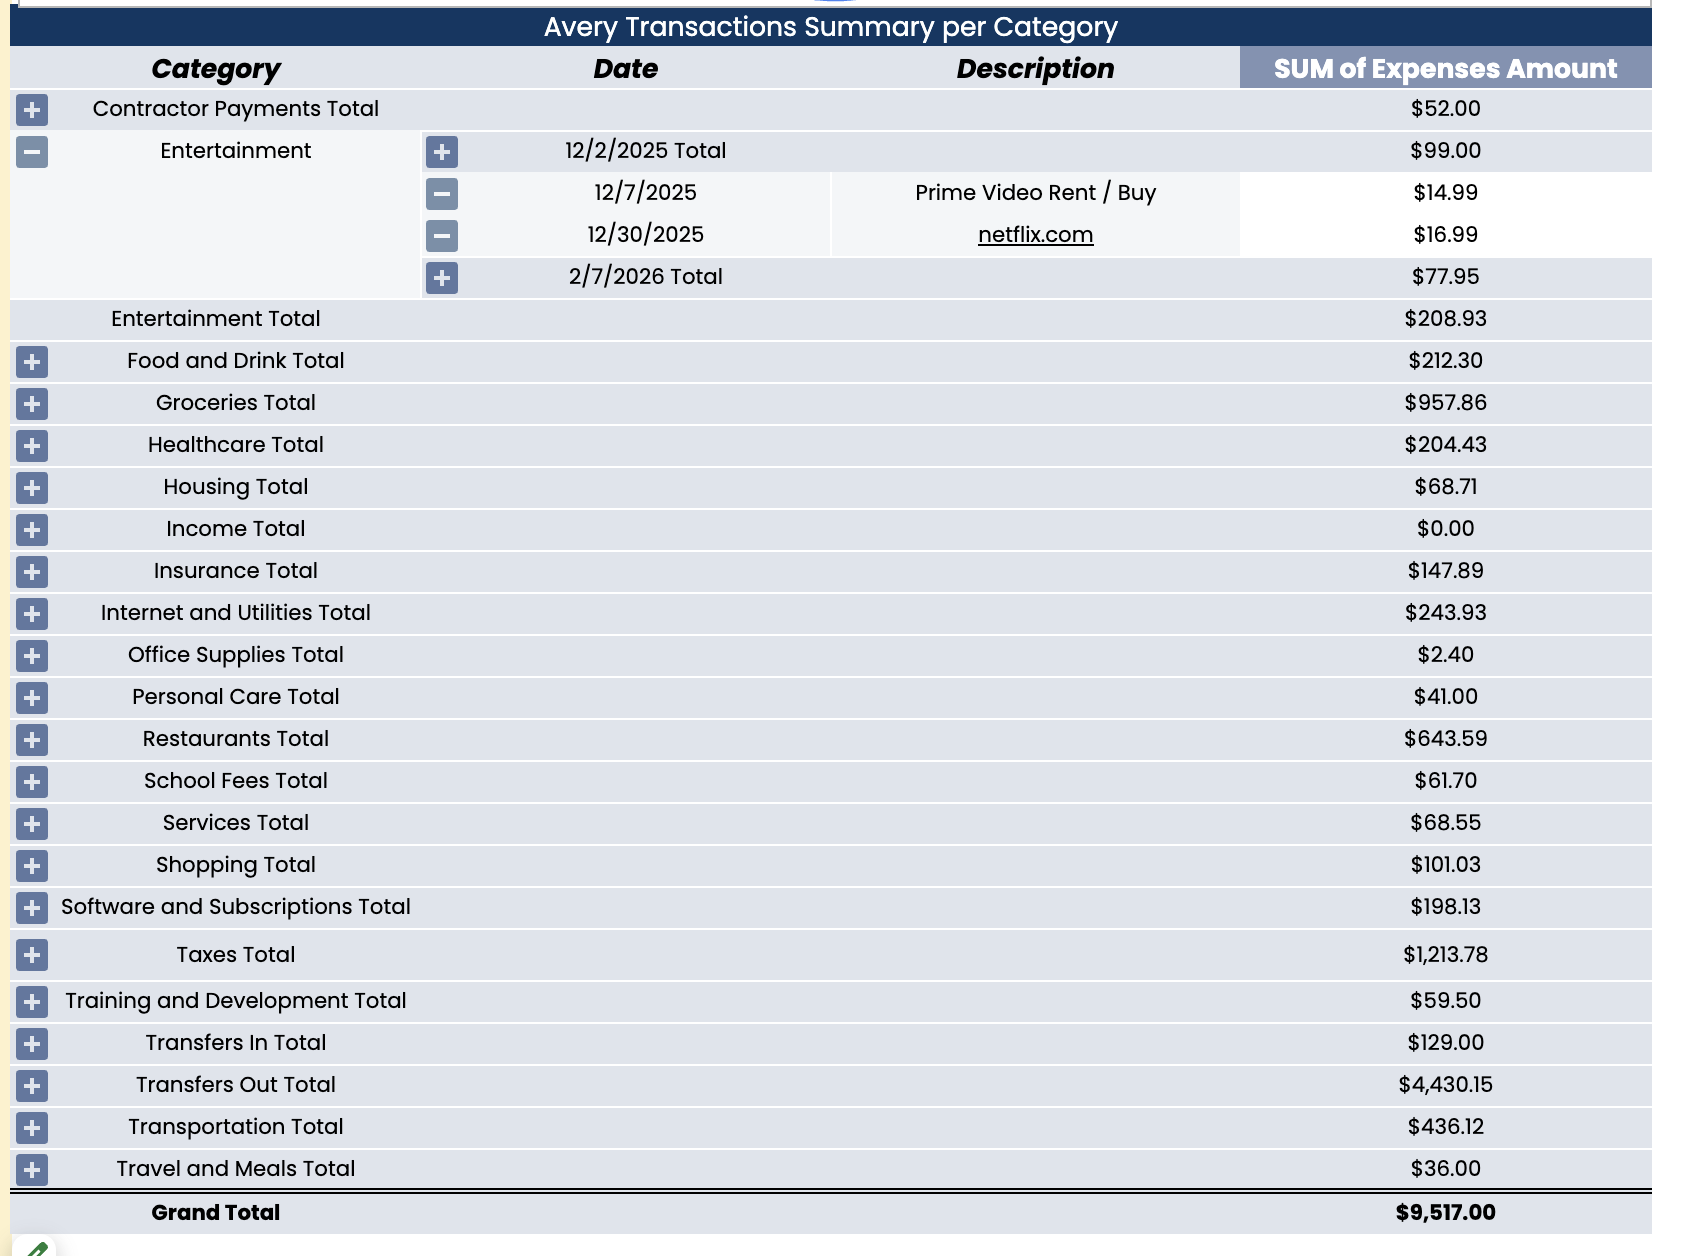
This expands the section so you can view the individual transactions inside it.
Use this to:
check whether transactions were categorized correctly
understand what is driving your spending
spot subscriptions, habits, or charges you may want to reduce
Create the budget you want to follow going forward
After reviewing your 3 month averages, enter the budget you want to stick to for each category moving forward.

A good way to approach this is to:
use your average spend as a starting point
keep fixed costs close to their real monthly amount
reduce variable categories where you want to spend less
focus on a budget that feels realistic and sustainable
The goal of the lookback is not just to show where your money went. It is to help you build a budget based on your real spending habits so you can make better decisions going forward.
Best practices
Keep the template structure in place while you set up.
Do not remove the default categories.
Add your own categories below the existing ones.
Review Uncategorized and IGNORED before finalizing your numbers.
Use the + button to drill into any category that needs a closer look.
Base your new budget on real spending patterns, not guesses.