Setting Up the Budgetdog Template - Step by Step
This is a step by step guide of exactly what you should do and the screens you will see when setting up your Budgetdog template with Avery for the first time.
Avery speeds up your budgeting workflow, but it doesn’t replace it.
You’ll still need to review categories, keep your template updated, and make decisions based on your budget. Avery removes manual data entry and repetitive steps so you can focus on the actual budgeting.
Before You Begin
For Avery to work correctly make sure you have:
A Google account where you can access Google Sheets
An active Avery trial or subscription
A laptop or computer. iPads and mobile devices DO NOT work as well
Step 1: Get the Budgetdog Template
Start by creating your own copy of the Budgetdog template in Google Sheets.
Click this Budgetdog Template link
Click Use Template in the top right corner to create a copy in your Google Drive
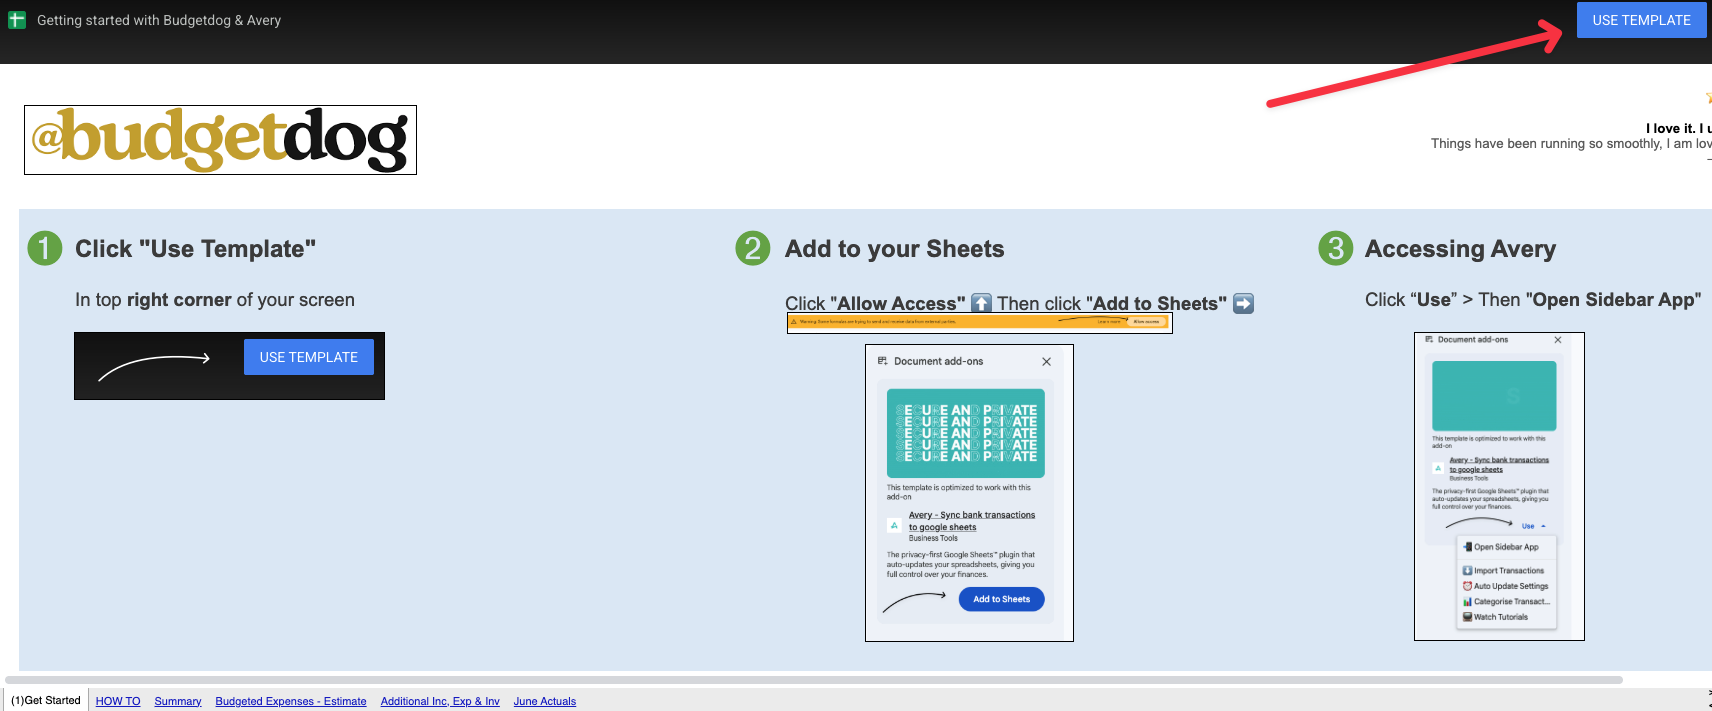
The template will open in a new Google Sheet with pre-configured tabs.
Step 2: Install the Avery Add-on
The Avery add-on is what powers the bank connections and transaction syncing.
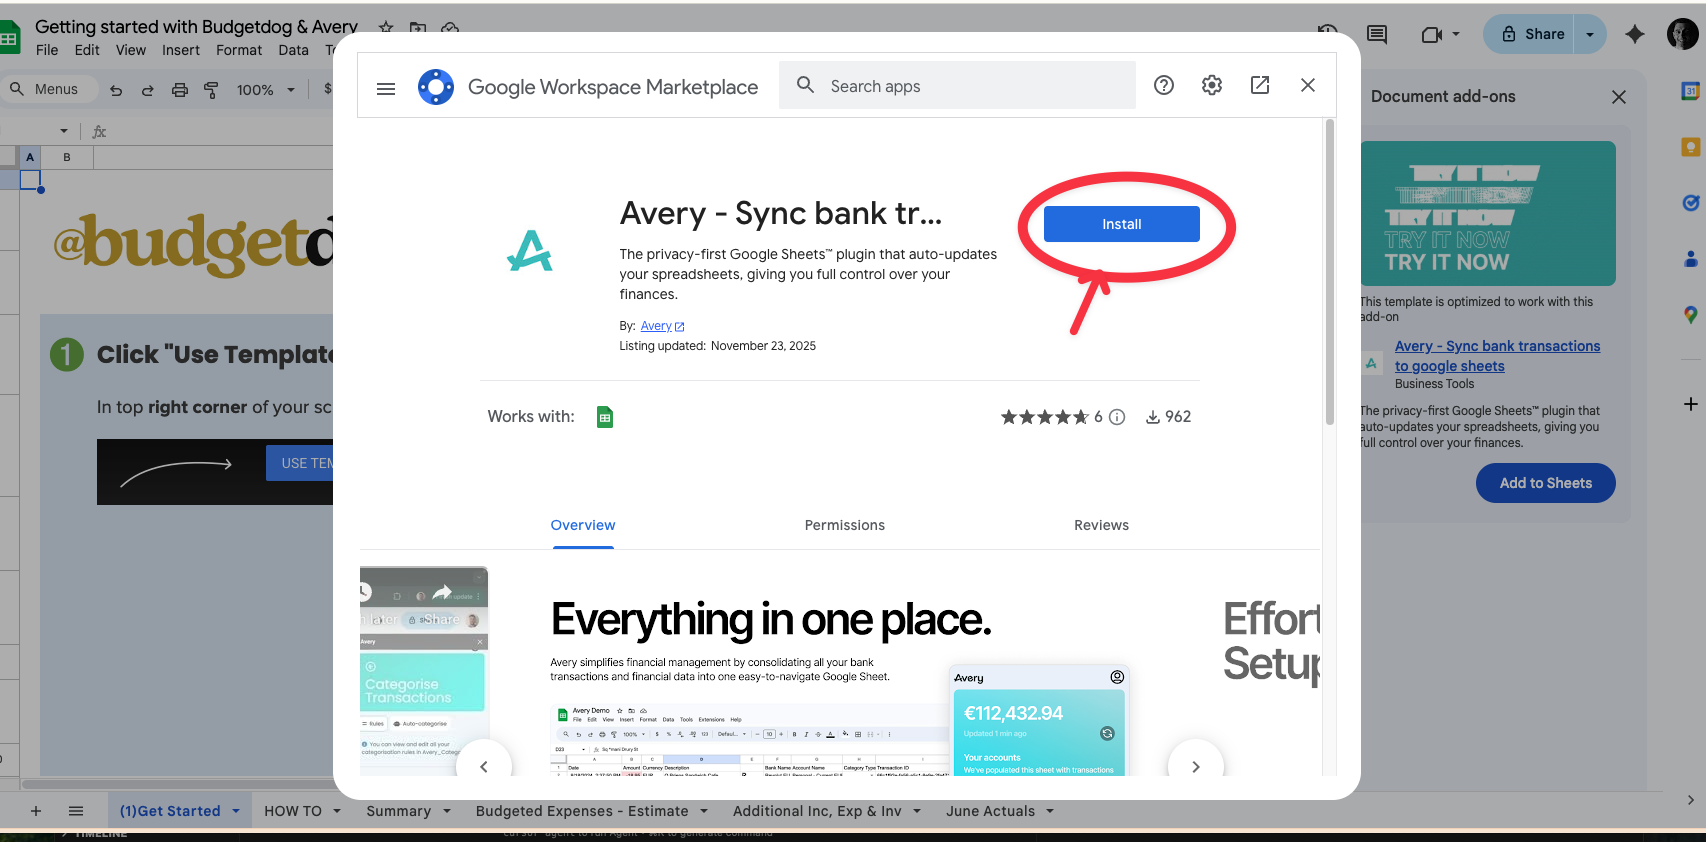
In your new Budgetdog spreadsheet. Click "add to sheets" on the sidebar on the right
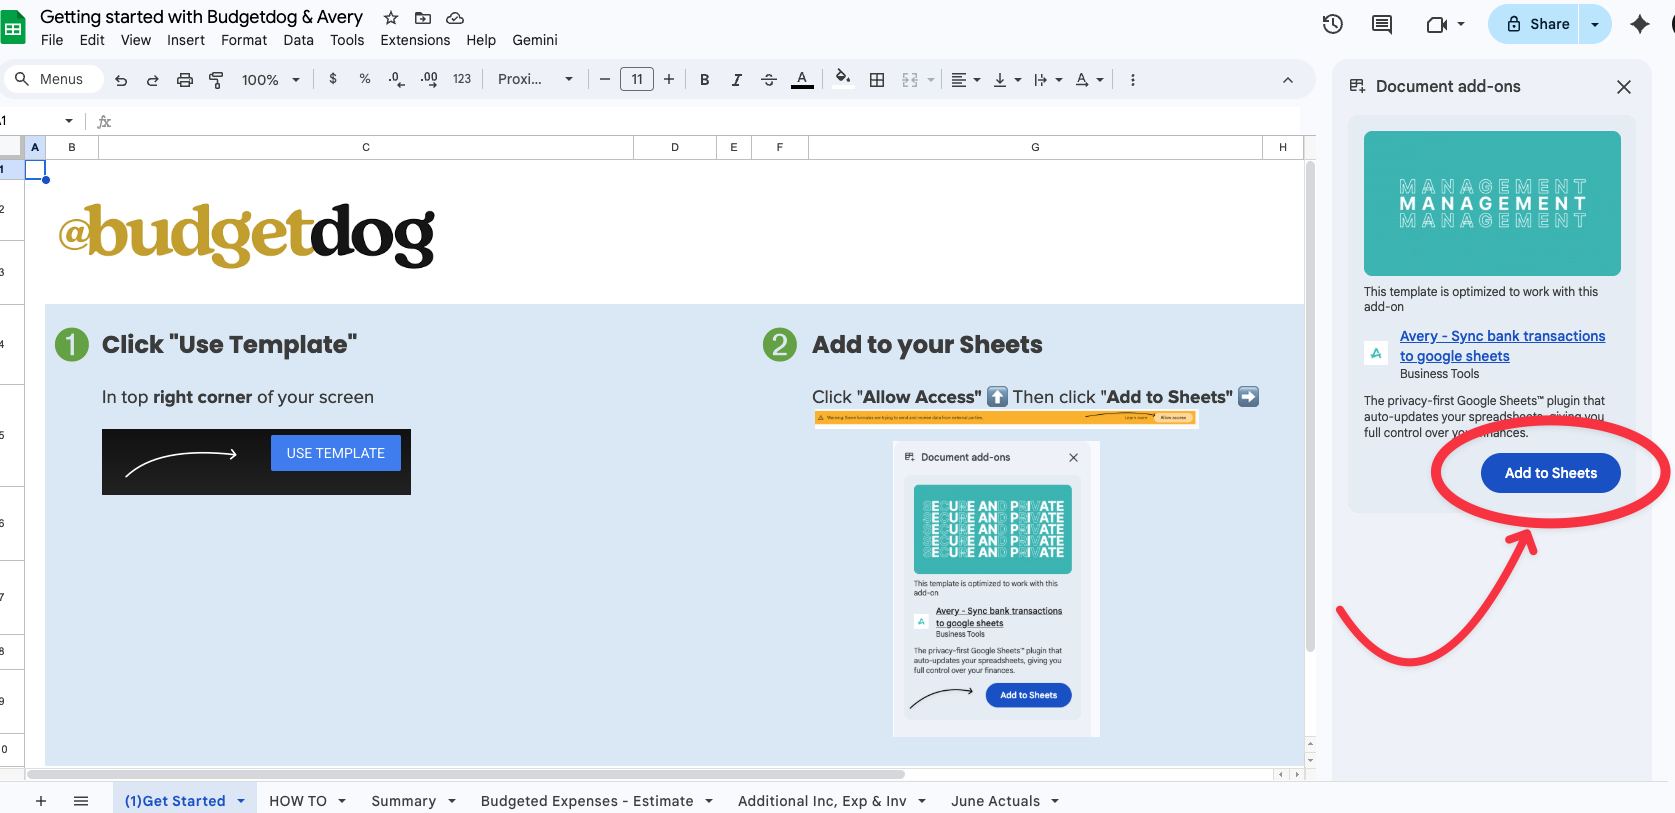
Click Install and then grant the necessary permissions
Once installed, you will now see "use" instead of add to sheets. Click that to open Avery.
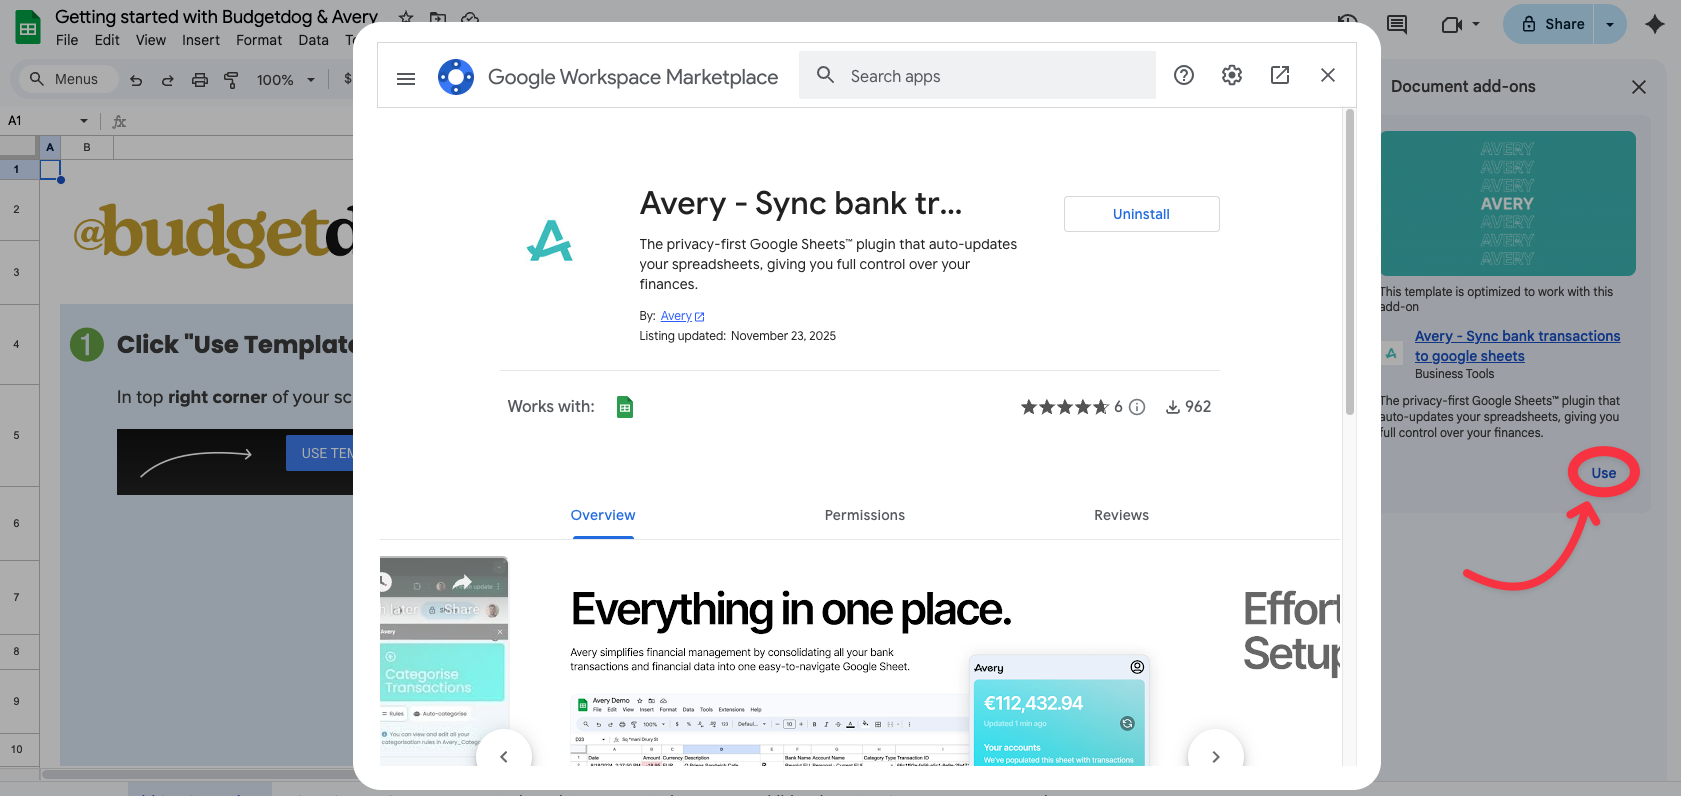
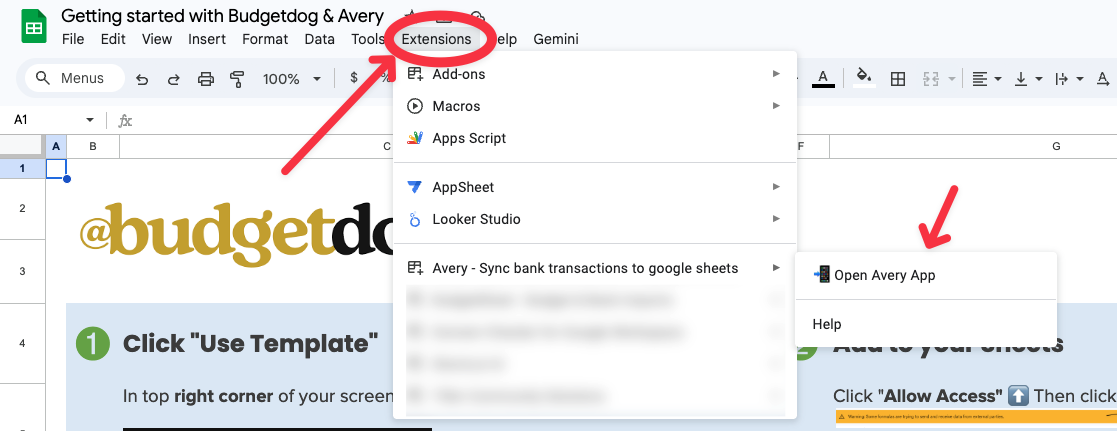
If you ever accidentally close out of Avery you can always find it by click "extensions" at the top of your google sheet.
Step 3: Link Your Bank Accounts
Connecting your bank lets Avery automatically import transactions into your spreadsheet.
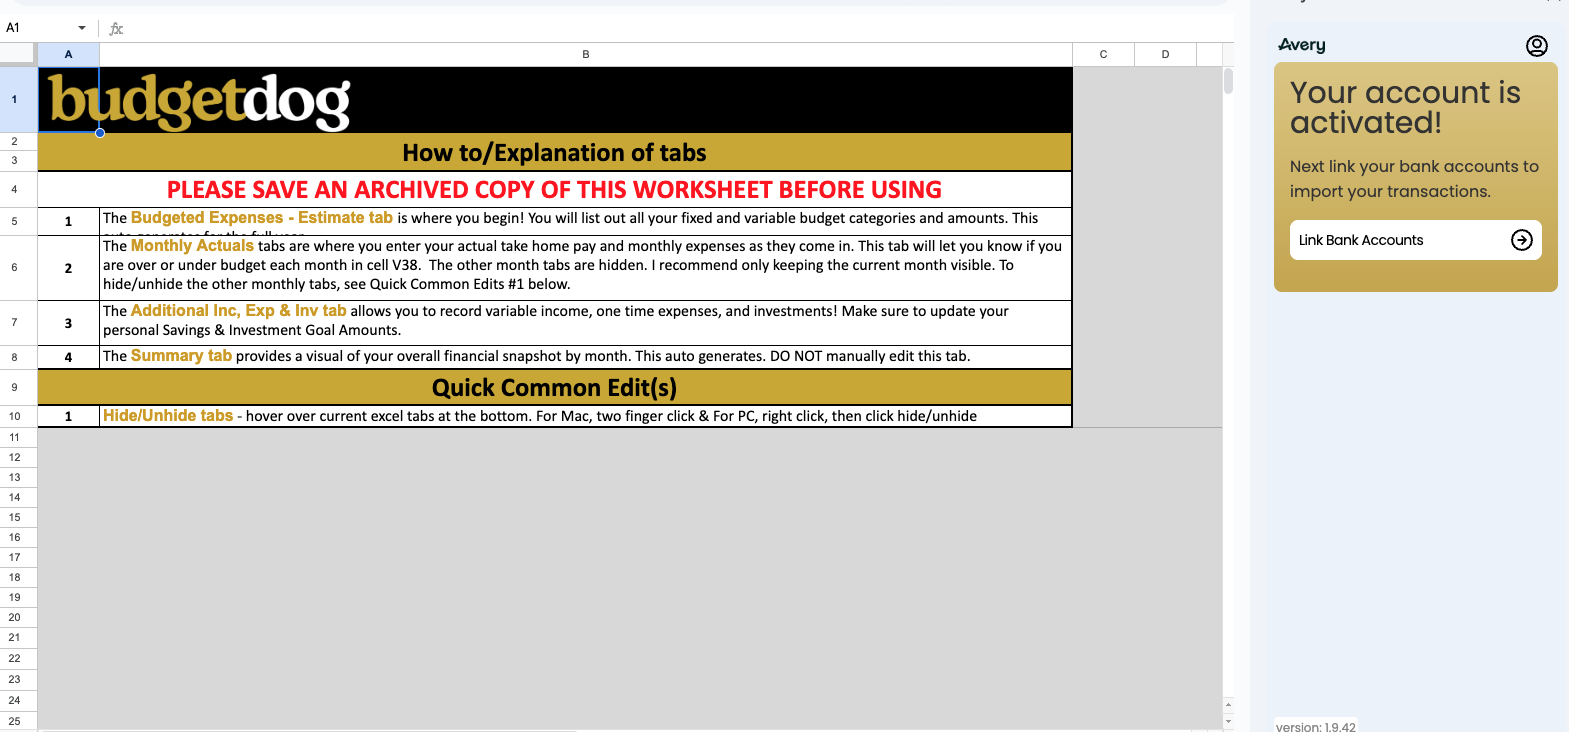
Once the Avery sidebar is open, click the Link Bank Account button
Select your country and then your bank from the Plaid list
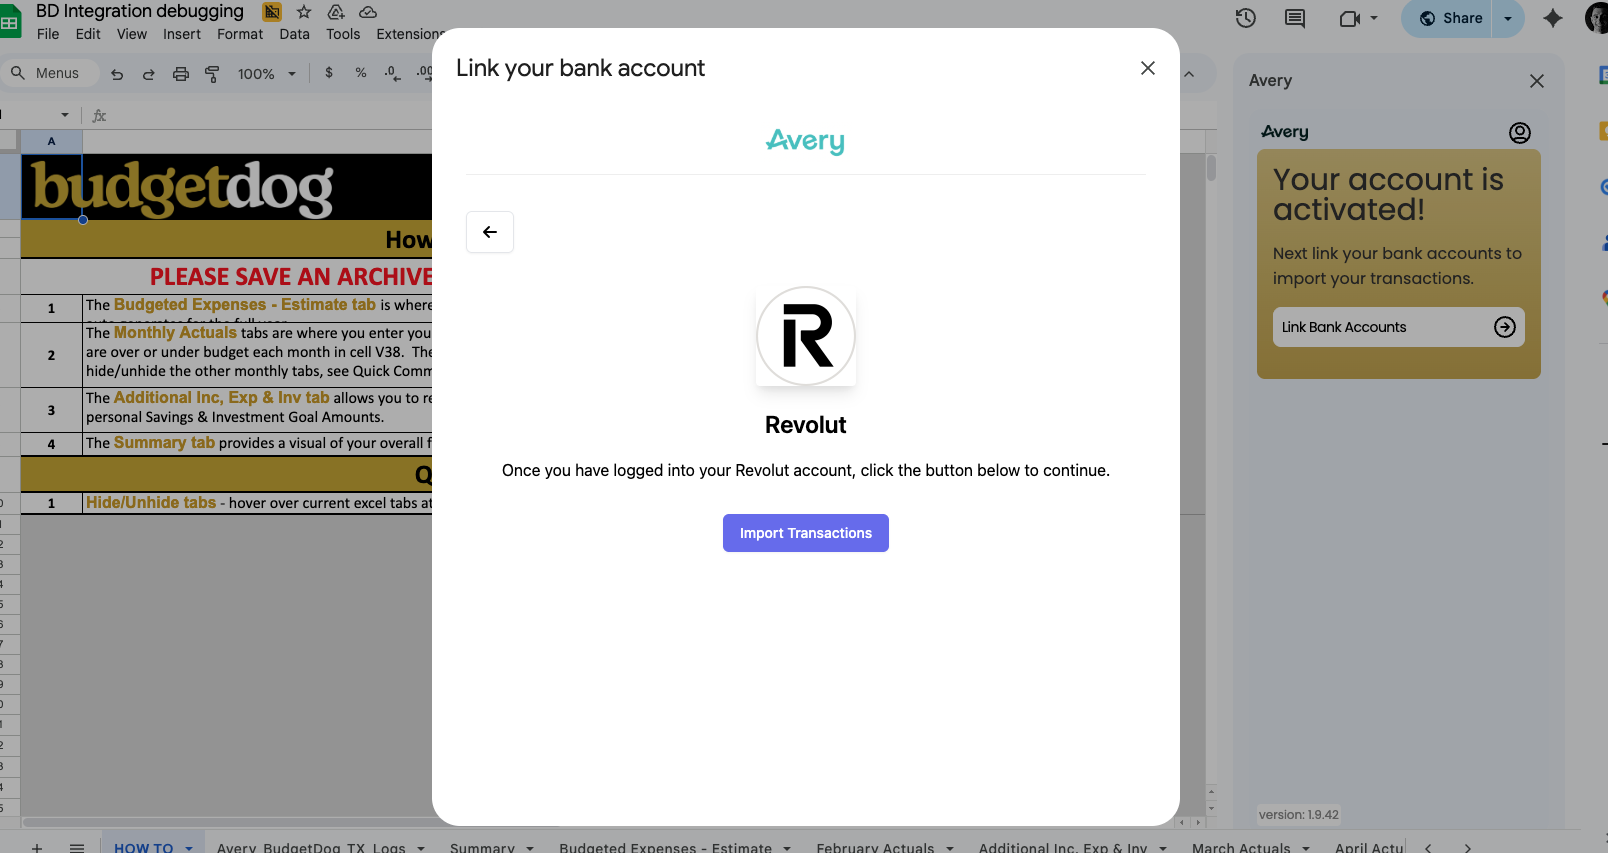
Log in to your bank through the secure OAuth window
Select which accounts you want to connect
Grant consent for Avery to access transaction data
Wait for the "Bank connected successfully" confirmation
Once connected, click Import Transactions
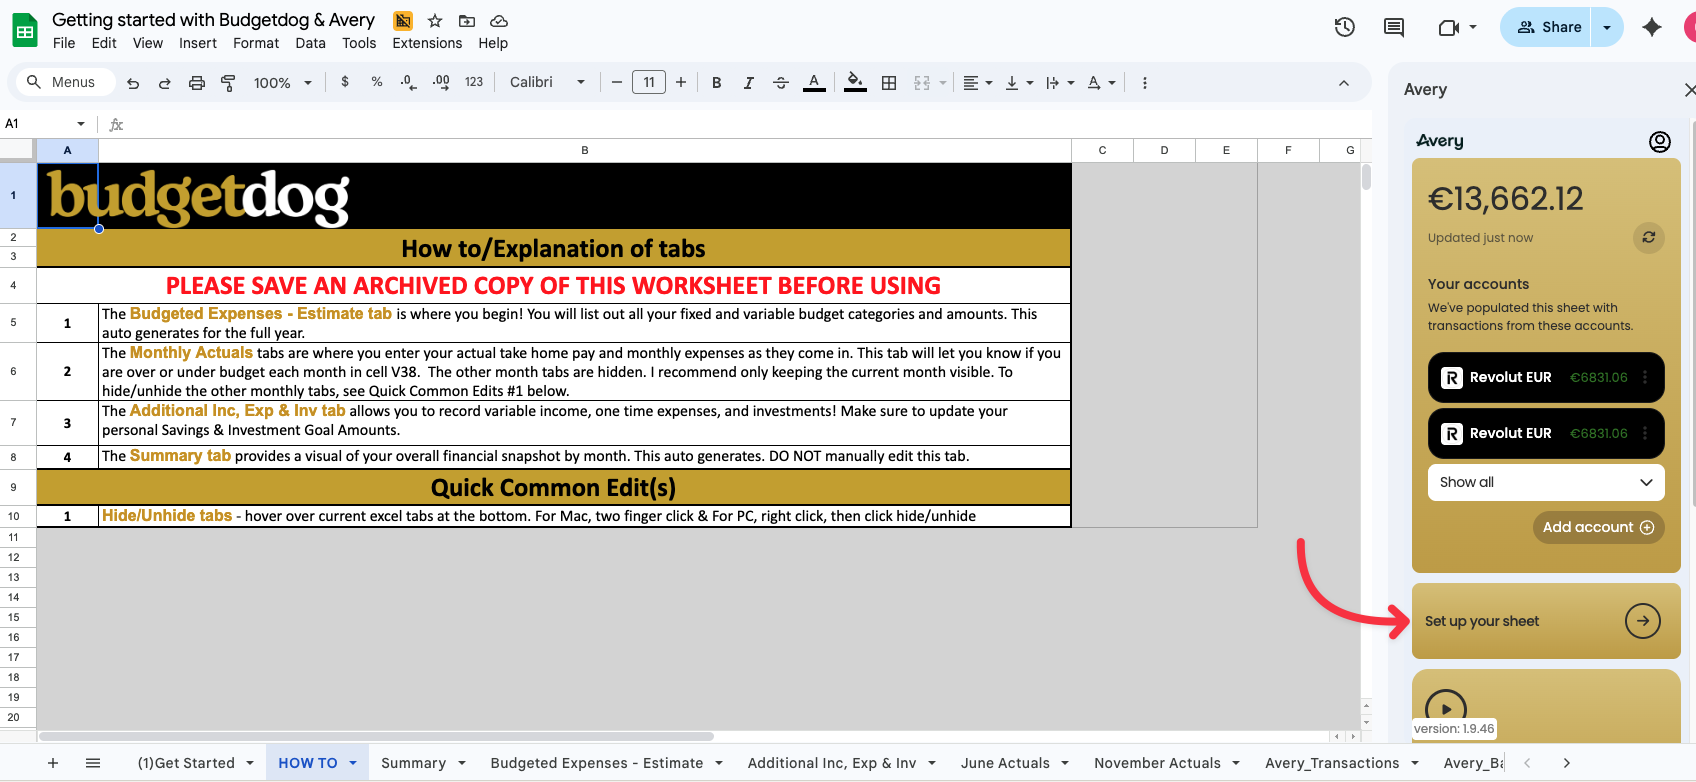
After you link your accounts and import your transactions it will look like the screenshot below.
Click "Set up your sheet"
Step 4: Setting Up Your Categories
This is the most important step in your setup. Categories determine how your transactions map to your budget, and incorrect categories will break your reports
Understanding Budgetdog Categories
The Budgetdog template has a fixed set of categories in the sheet titled "Budgeted Expenses - Estimate" when you first get to this page you will see the pre-defined categories like below:
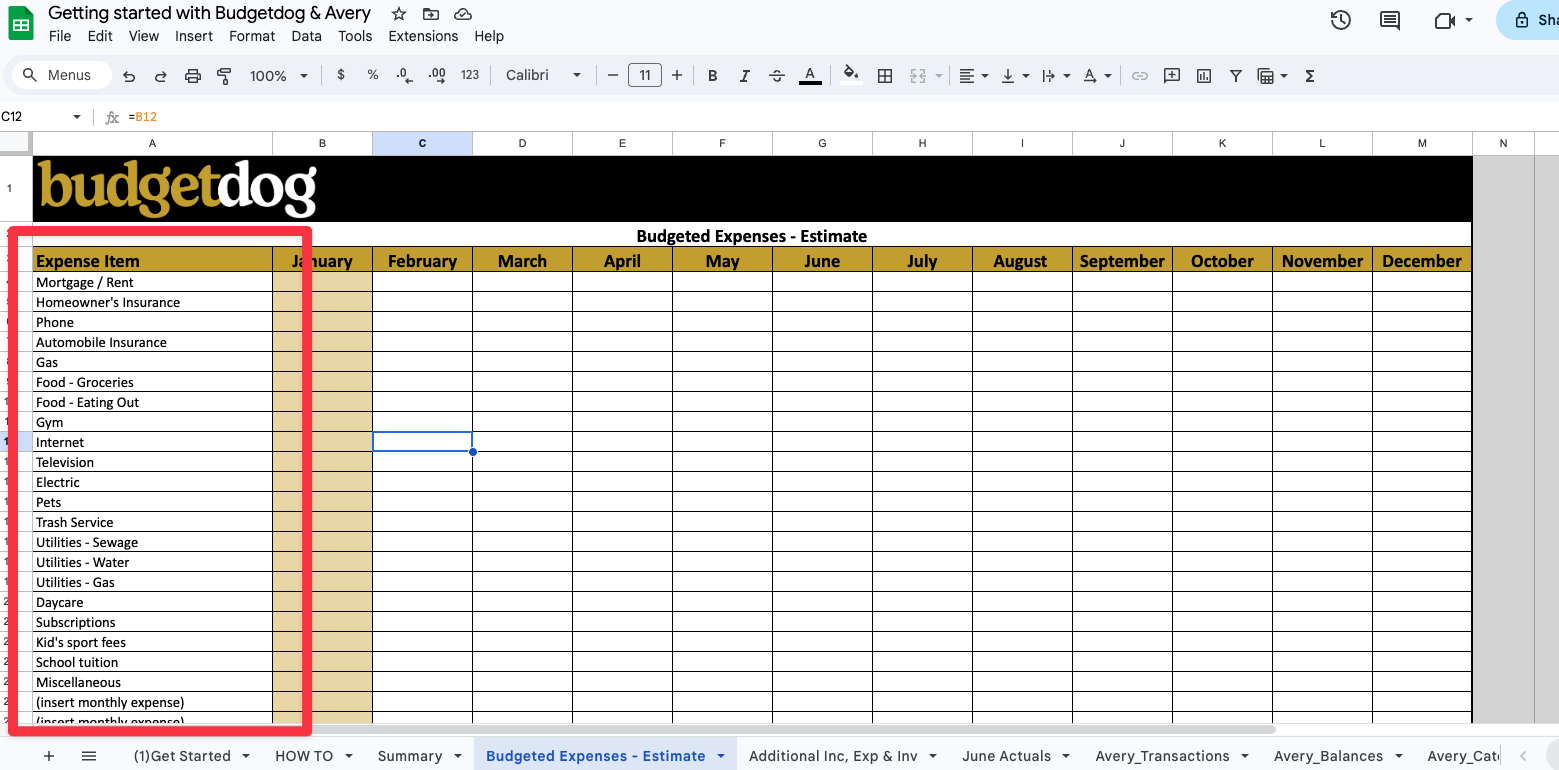
You should edit, add or replace the categories that are there with the categories that you want to use in your budget and is relevant to your personal financial situation.
Avery auto-categorizes your transactions based on the categories that you create in this section. Avery's Ai will read the description from the transaction that is provided by your bank and then try to map it to the most relevant category that you created.
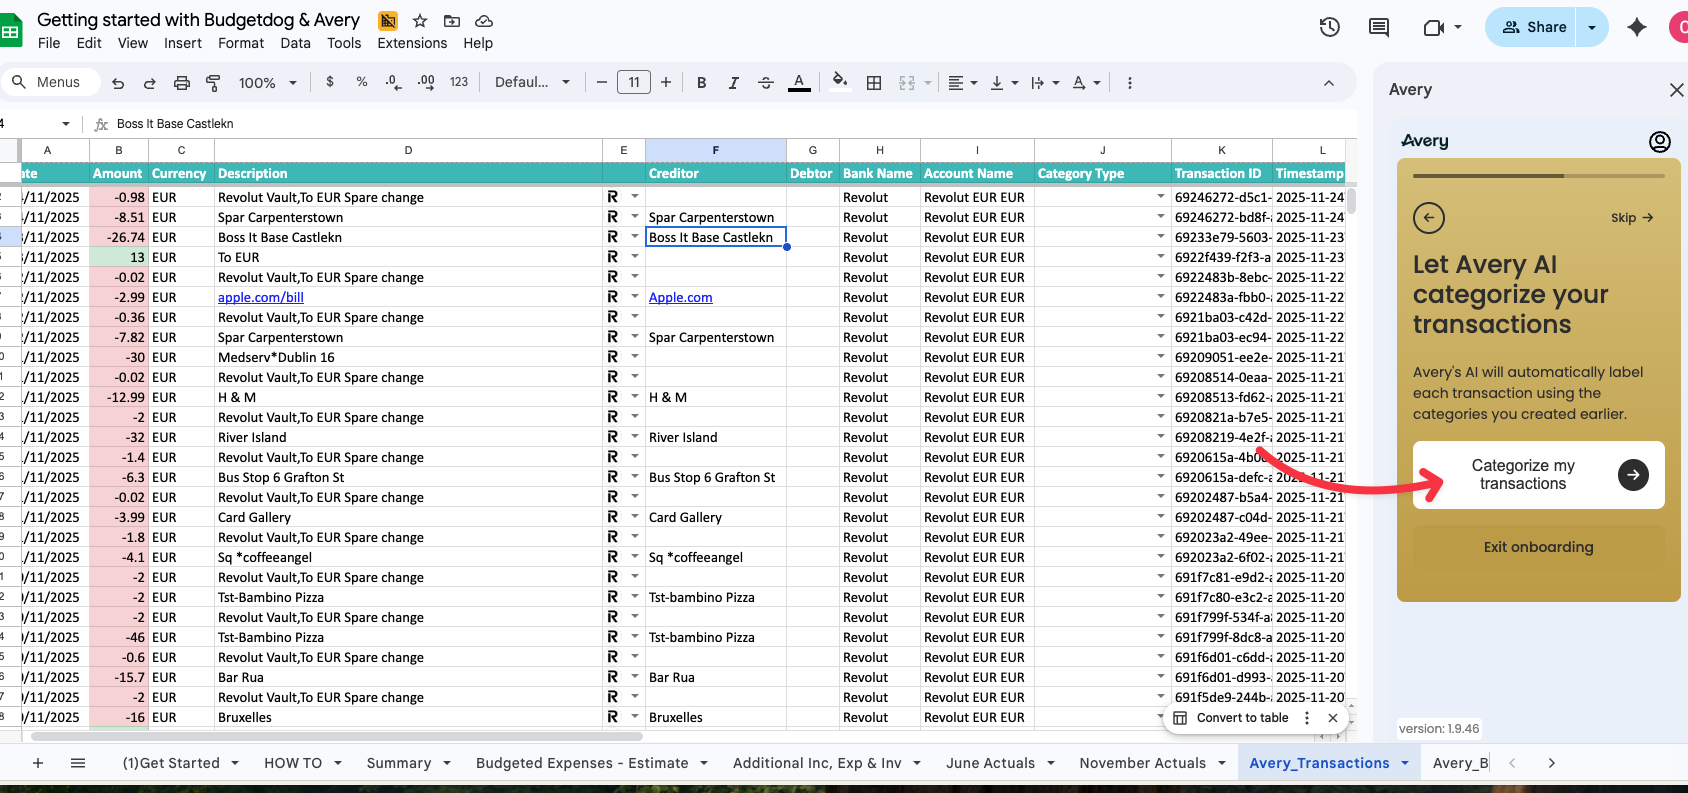
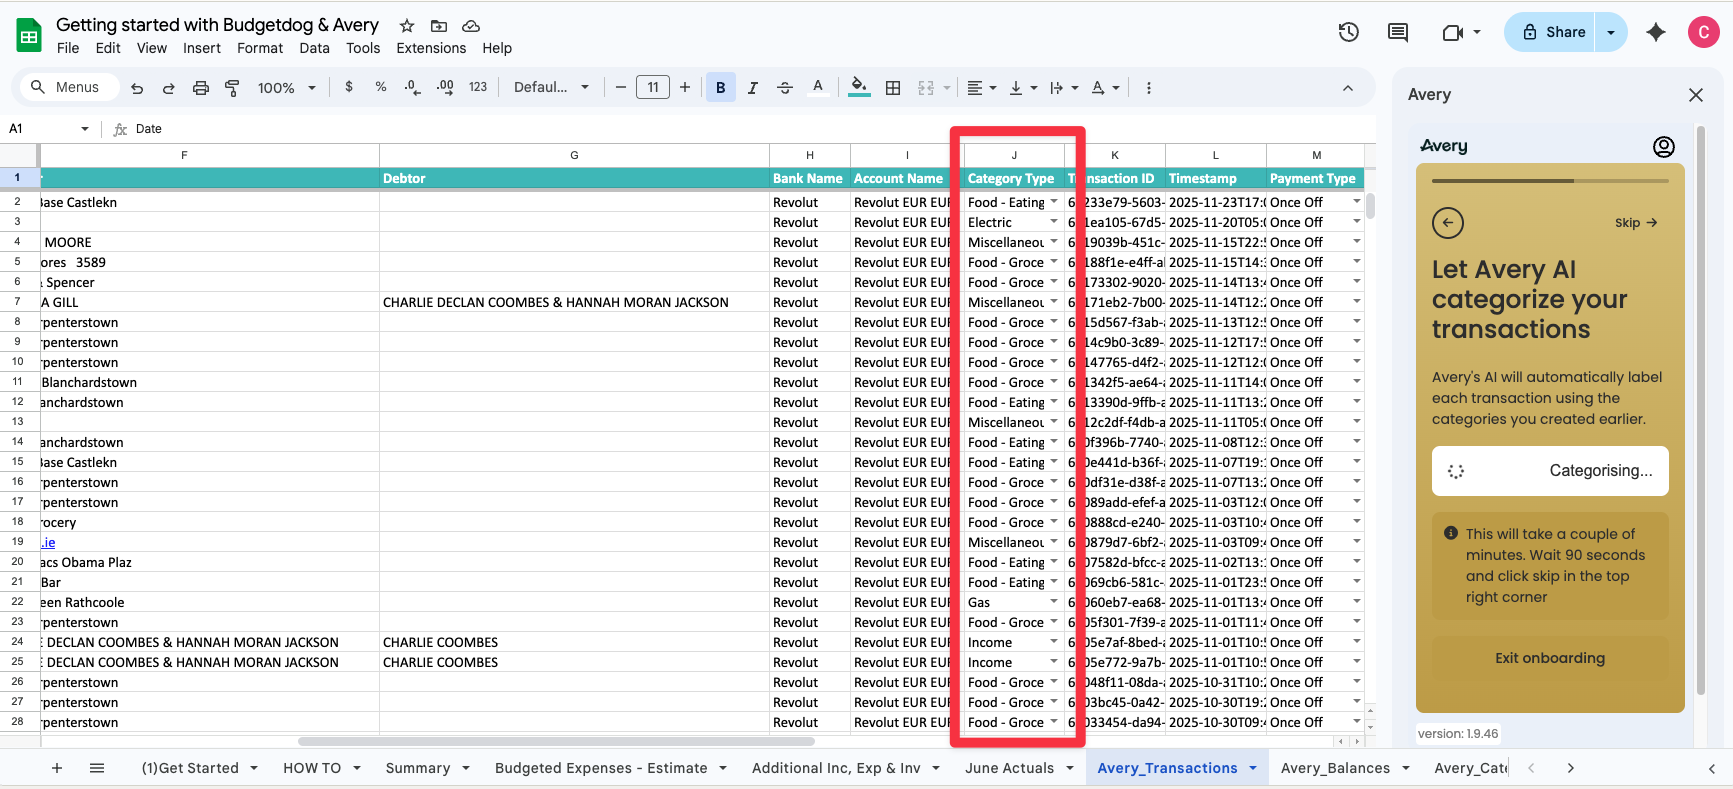
Once your categories are created and transactions are imported click "Categorize my transactions".
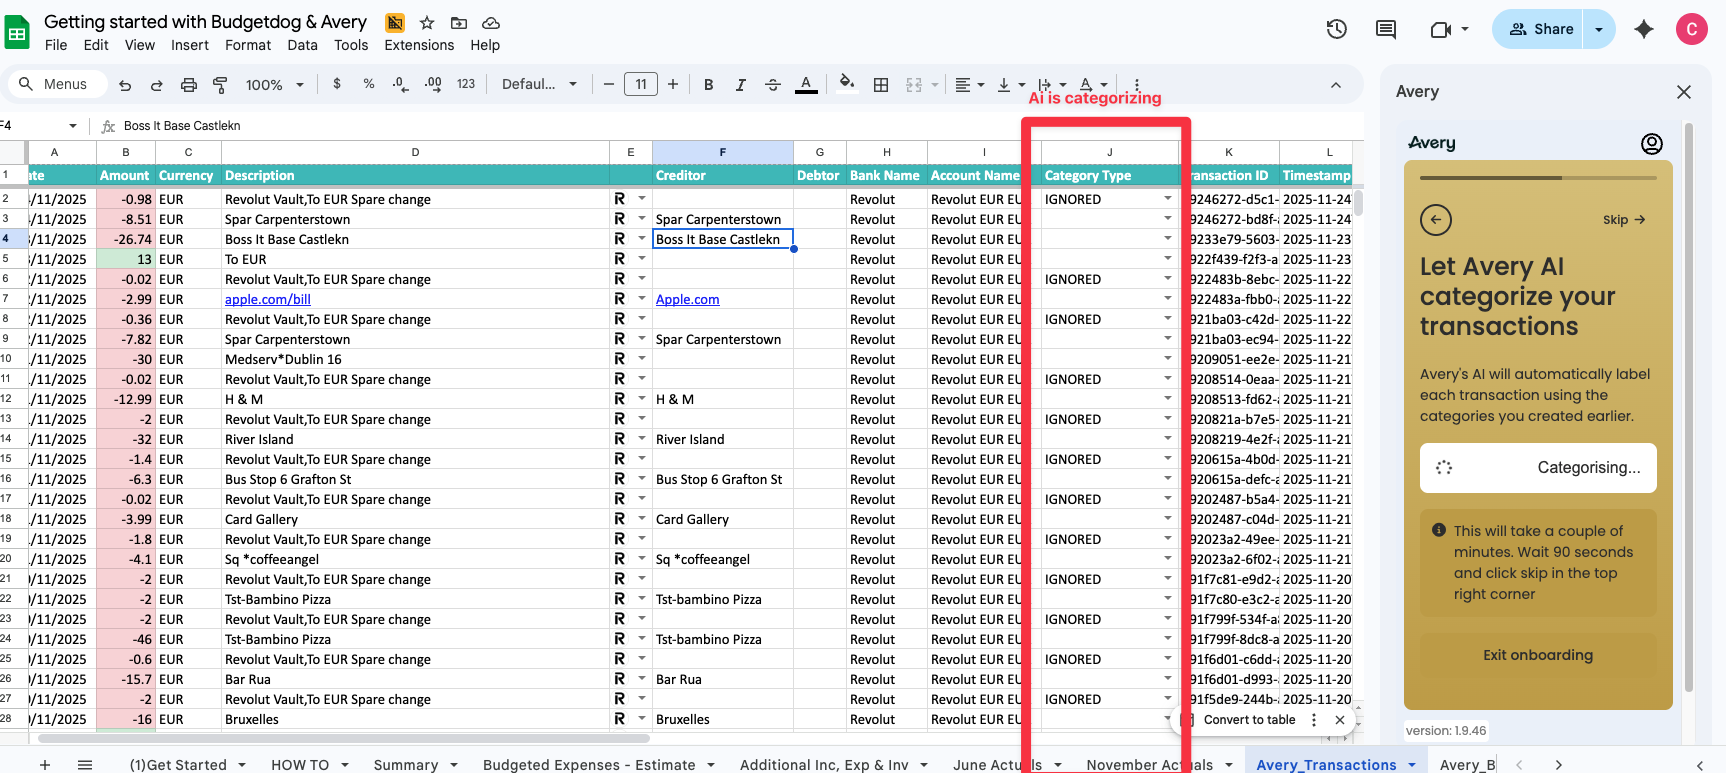
Ai categorisation can take a few minutes. Wait for 1-2 minutes and when you start to see things populate in Column J you can go to the next step by clicking "skip" in the top right of the sidebar, Avery Ai will still work in the background.
Step 5: Reviewing Your Categories and Training Your Ai
NOTE: This is the most time consuming part of the set up but you only have to do this once!
Ai is amazing for speeding things up but it's not perfect. This stage is where we train your Ai to know exactly how you want your transactions categorised moving forward.
We made a video walking through this section. I'd recommend watching it, it's 4 minutes long.
Reviewing your categories
Find Column J in your sheet and you'll see the categories that Avery's Ai is mapping your transactions to (you might have to scroll horizontally to see column J)
Read the transaction description in Column D to see if the category the Ai assigned is correct.
Google Sheets tip: I like to hide columns E - I so that I can see my transaction description right next to the categories. To do that simply select Column I then HOLD the shift key on your keyboard and select Column E, once that's done right click on your mouse and select the option to hide columns E - I. This gif shows how
If it looks correct then you can leave it and don't have to do anything. In the screenshot below you can see that it categorized eating at a "Pizza Restaurant" as "Food - Eating out" and categorized the "Energy Bill" as "Electric". Both of these are correct so I don't make any changes.

But for transactions that look incorrectly categorised then you need to add this as a rule to train the Ai.
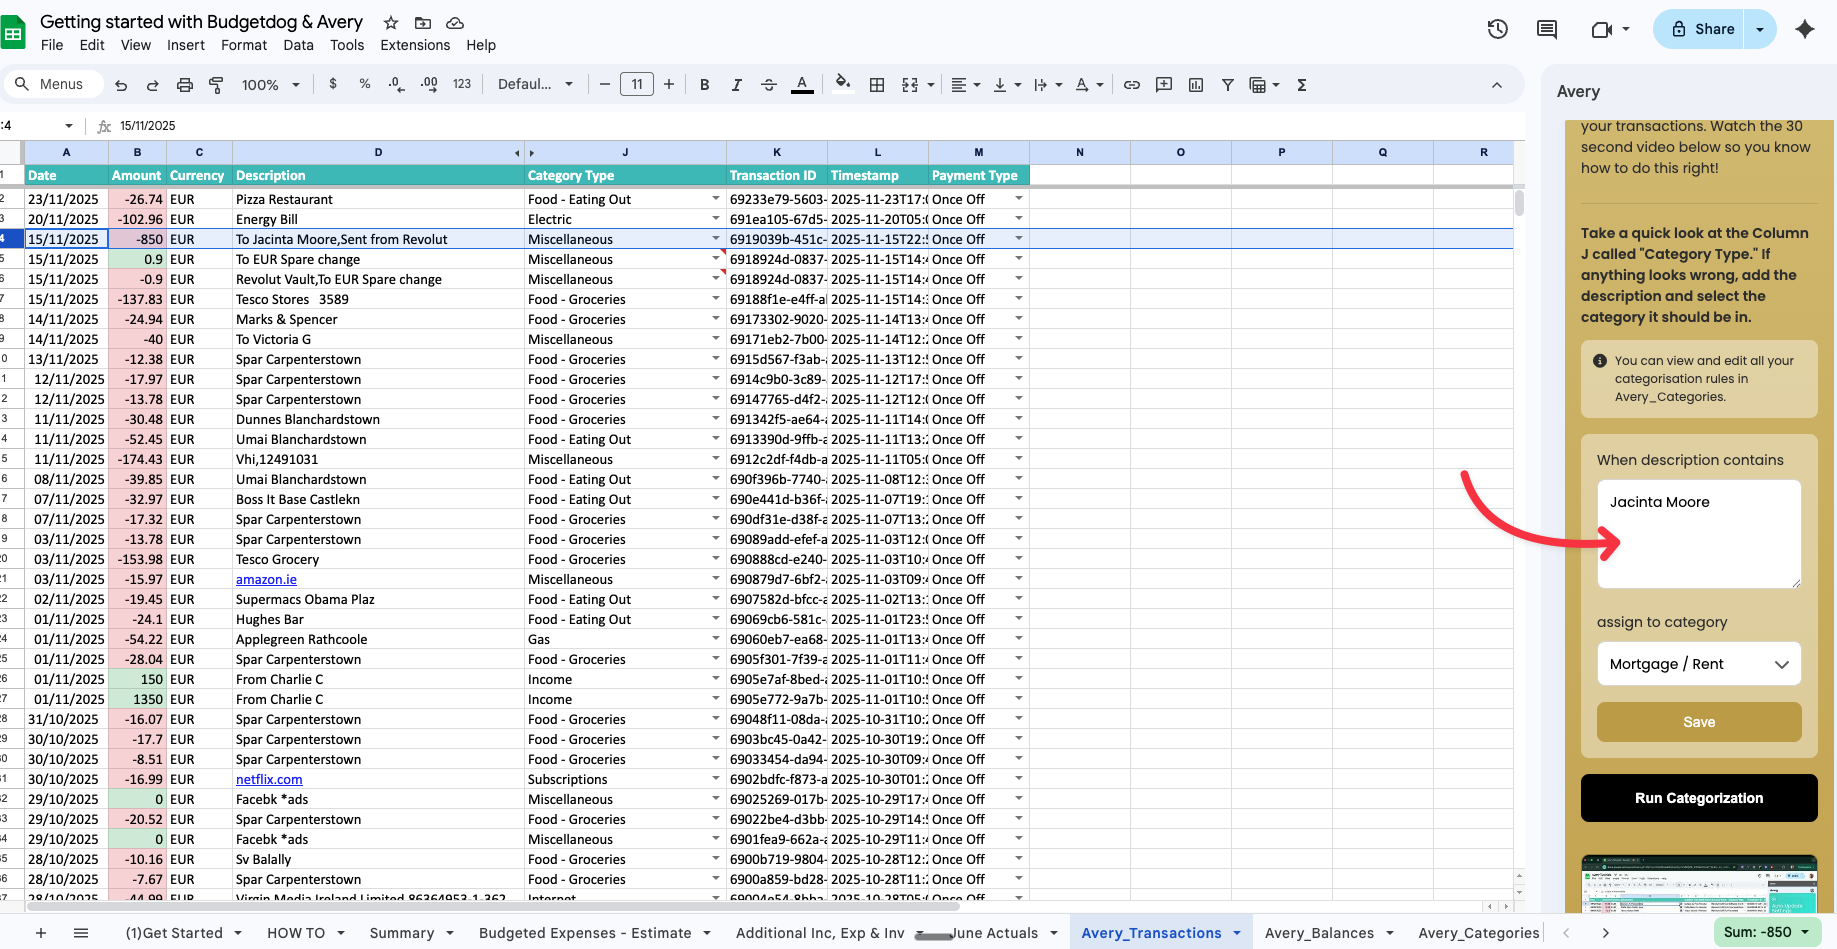
In the screenshot below you can see that it Categorised all three as "Miscellaneous" but in this case the 850 to Jacinta should be "Rent" and the "Spare Change" should be ignored.

To fix this in my current sheet and going forward all you need to do is in the sidebar choose the category that you want the transaction to be in and then type what the description says. The example in the screenshot is telling Avery's Ai anytime you see a description that has the words "Jacinta Moore" in it then it should be categorised as "Mortgage/Rent".
You can add as many descriptions as you want to assign to the category at one time they just need to be separated by comma. For example, in the screenshot below I've added everything I want to be categorised as "IGNORED" moving forward.
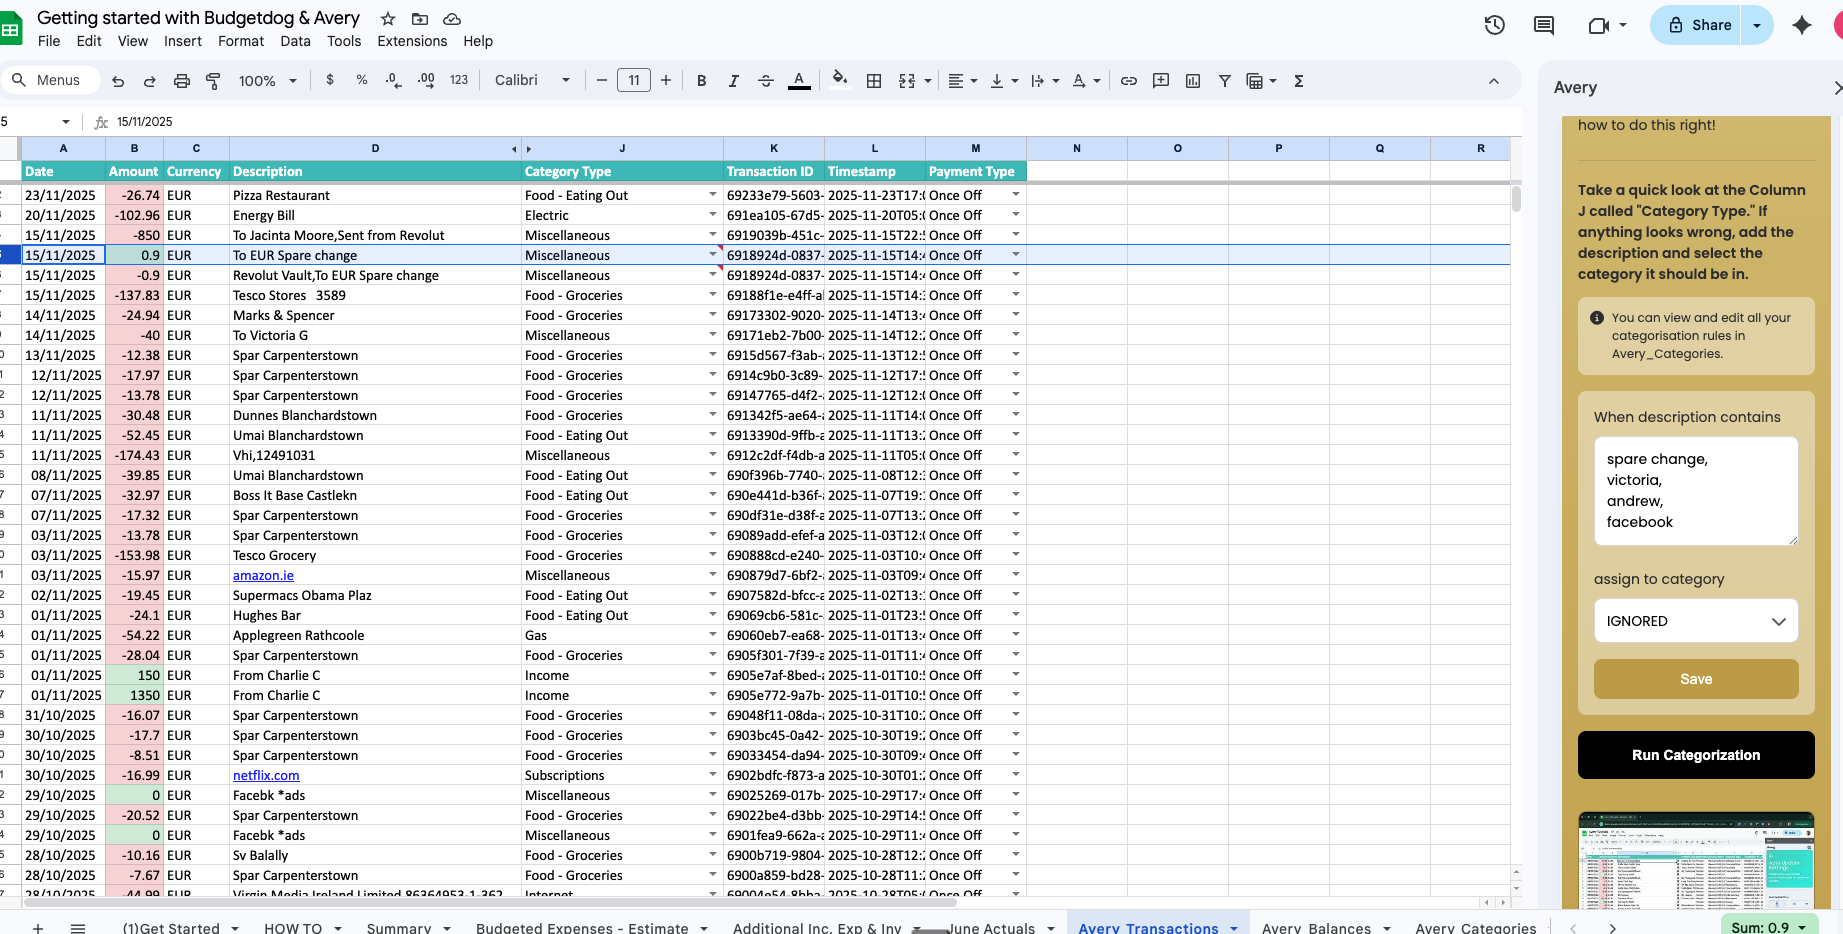
Make sure to click "Save" after you've completed each category
Repeat this process for all the transactions that are miscategorised
Once you've saved all your categories click "Run Categorisation" it will automatically fix all the categories and then from now on the Ai will always categorise based on those rules you just made

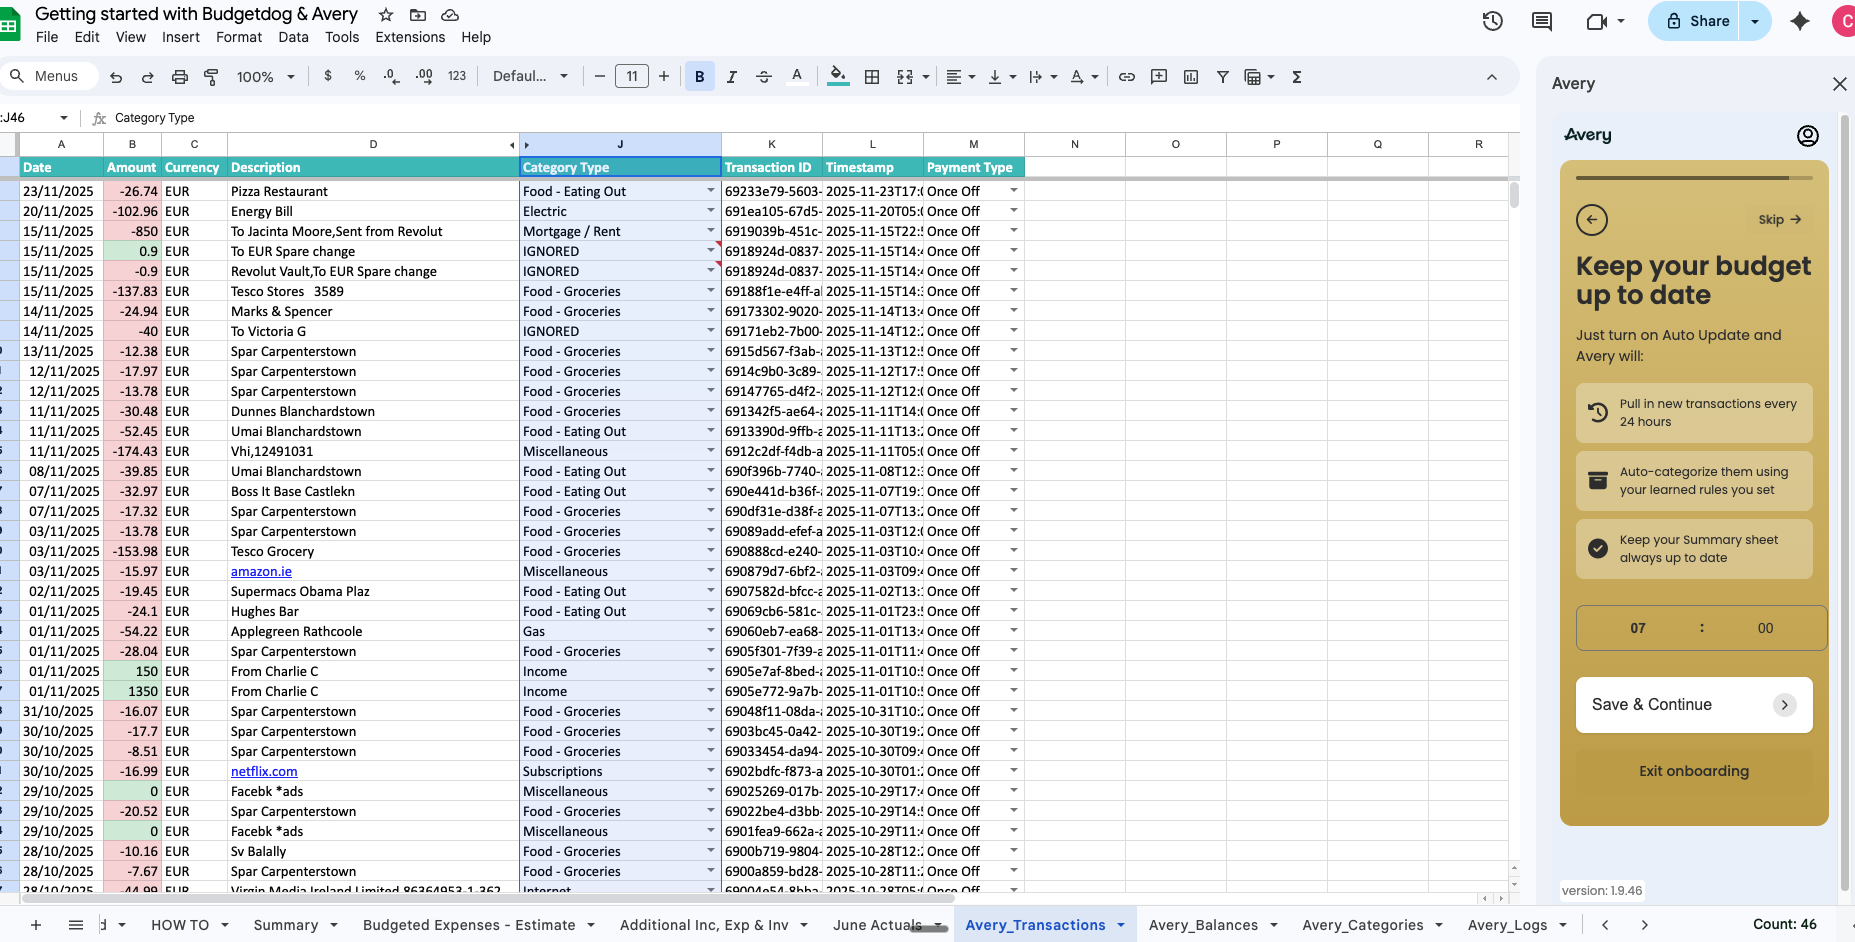
Step 6: Setting Auto Update
After you reviewed your categories and trained the Ai on your preferences. All you have to do is pick the time each day that you want your spreadsheet to update at:
Your Budgetdog template is now set up! Remember to review regularly and keep your categories up to date to keep your budget accurate.
Using Avery After Set Up
Once you've gone through and set up your sheet correctly Avery is simple to use. On the home page you will see:
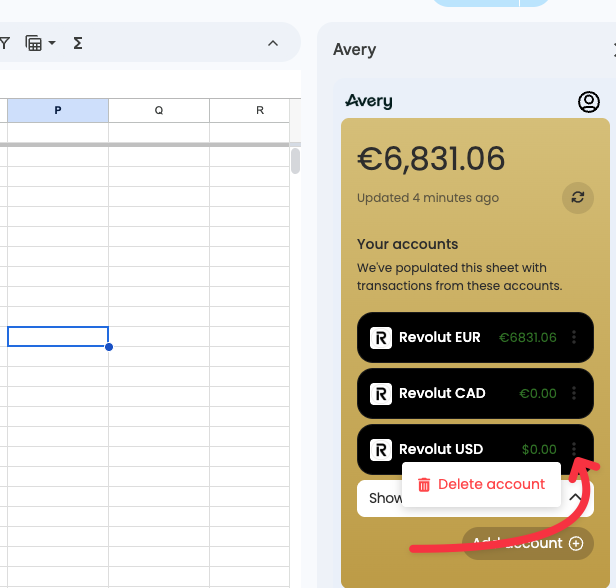
Your accounts: You can add more accounts or delete any directly from here
Set up your sheet: This will bring you back through the set up process you went through before to set up categories, review categories etc..
How to use: A short video explanation of how Avery works and how to navigate
Settings: You can see your plan information, manage your subscription and contact support
Quick Actions: This is where the feature set lives. In here you can manually import transactions, make changes to your auto update times, create any rules for your categories and if you need to you can reset your sheet
Most Common Issues After Set Up
The Numbers in The Template Don't Look Accurate
When reviewing your template if your monthly actuals tabs or any of your summary charts looks wrong or shows errors.
The most common reason is that transactions are categorised incorrectly.
Go to the sheet Avery_Transactions tab to view all of your transactions
In the sidebar click "Quick actions" > "Categorize transactions"
Check the category that the transaction is assigned to in Column J
For any transactions that are incorrect create a "rule" and then "run categorisation"
I'm Seeing Duplicate Transactions
If for any reason you are seeing duplicate transactions throughout your spreadsheet:
Check the "Accounts" section in the sidebar:
If you see what looks like the same account linked twice
Click the 3 small dots on the right hand side of that account and delete the duplicate account